
However, using Powershell is the only one effective and efficient way to delete all files to perform the disk space maintenance if the common way to delete files and folders cannot solve your problem.
Why? It is because by using Powershell, the housekeeping task will be automated using the scripts. So, are you looking for the way to delete files and folders using Powershell? If so, let’s find out the answer below!
How to Delete Files & Folders Using Powershell
Before you delete files and folders using PowerShell, at least you need to follow some main ways below!
- Way 1: Open Windows PowerShell
- Way 2: Identify the folder that you want to delete
- Way 3: use Remove-item command
Way 1- Deleting a File Using PowerShell
At least, there are some methods that you can take to delete either a single file or multiple files by using PowerShell. Here’s how to do it:
Method 1: How to delete a single file
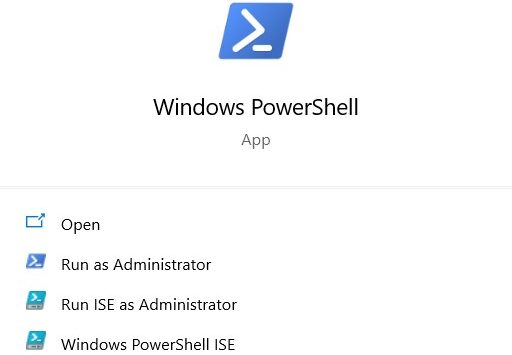
- First thing first, make sure that you already open the PowerShell on your Windows.
- To open PowerShell, you are able to hit Windows key + X. Then, choose Windows PowerShell from the list.
- Instead, you can look for it in the Taskbar search box.
- Once you get it, you can enter the following command: Remove-item file-path
However, this is a basic command form of the command.
Here, let’s assume that you have a file named TWC.png in the TWV folder on your desktop.
Well, to delete it by using PowerShell, you can enter the following command:
Remove-item C:\Users\user-name\Desktop\TWC\TWC.png

In this way, you need to include the file extension of the file in the command. Apart from this, it will not recognize your command and a welcome message will welcome you.
Method 2: How to delete a single file using different command from the first method
In the second method, you need to get started by running a simple command to delete a single file. Ensure that you have logged into the server or Pc with an account which has full access to the objects that you want to remove. Here’s how:
- First, you need to open a PowerShell prompt by switching to the Start button.
- Then, type PowerShell. Once you find it, hit Enter.
- In the PowerShell console, you can type the following command: Remove-Item –path c:\testfolder –recurse. Hit Enter.
- Replace the c:\testfolder with the full path to the folder that you want to delete.
In this case, the -rescue parameter can allow the PowerShell to delete any child items without asking for the permission. In addition, the -force parameter can be added to remove hidden or read-only files. If you really desire to check the folder you have deleted, you can type dir c: in the command prompt and hit Enter. Then, replacing c: with the parent directory of the folder that you already deleted.
Method 3: How to delete multiple files
If you really desire to remove more than one file, the command that you have to enter on PowerShell is totally different too. The command will look like as follow:
Remove-item file-path, file-path1, file-path2
In this way, you have to enter all the file paths. We assume that you have multiple files named TWC.png on your desktop and another file named TWC1.txt in the Downloads folder. Well, to remove it at once, the command that you have to enter is as follow;
Remove-item C:\Users\user-name\Desktop\TWC.png, C:\Users\user-name\Downloads\TWC1.txt
Way 2: Deleting Folder Using PowerShell
You can also use PowerShell to delete either a single folder or multiple folder which is certainly by using a certain command different from the command when deleting the files. Here’s how:
Method 1: How to delete a single folder
In case you want to remove a single folder using Windows PowerShell, of course you have to enter the command as the following command:
Remove-Item folder-path
Here, let’s assume that you already have a folder named TWC on your desktop. Then, to delete it, you have to enter the following command;
Remove-item C:\Users\user-name\Desktop\TWC
If the folder you want to delete is empty, it automatically will be deleted immediately. But, if the folder has some files, you will need to confirm the delete by pressing Y and hit Enter button.
Method 2: How to delete multiple folders
Like when you deleting multiple files, however the command that you can enter using PowerShell is as follow:
Remove-item folder-path, file-folder1, file-folder2
We also assume that you have the folders named TWC. You can also use a following command like this:
Remove-item C:\Users\user-name\Desktop\TWC, C:\Users\user-name\Downloads\TWC1
However, the command above will remove TWC files from the desktop and TWC1 folder from the Downloads folder at once.
To note, if you use the command to delete the folders on your desktop or library, of course the files and folders will be deleted permanently. It means that you cannot recover the files or folders from Recycle Bin.
Way 3: How If You Cannot Open a Folder You Want to Delete
If you cannot open a folder but you want to know about the items within, you definitely can use this command:
Get-ChildItem folder-path
Here’s an example when you want to know the folder named TWV on your computer. Let’s enter the following command:
Get-ChildItem C:\Users\user-name\Desktop\TWC
By default, it will show the Mode, LastWriteTime, Length and Name. Here, you can also get the file name from. So, you can delete the correct items that you want to.
Way 4: How to Check Last Modification Time
You can also check the time when it is created or modified. To check it using PowerShell, you can enter the following command:
Get-ChildItem C:\Users\user-name\Desktop\TWC | Select-Object FullName, LastWriteTime, CreationTime

Then, you will find three columns with all the file names and other details.
Way 5: How to Force Delete an Item
Sometimes, you need to force in deleting an unwanted file or folder. Here, you can use -force parameter by entering the command like this:
Remove-item C:\Users\user-name\Desktop\TWC -force
Way 6: How to Delete File or Folder without Confirmation

If you do not want to get a confirmation message in deleting the files or folders using PowerShell, you can also use -rescue parameter by entering the command like this:
Remove-item C:\Users\user-name\Desktop\TWC -recurse

AUTHOR BIO
On my daily job, I am a software engineer, programmer & computer technician. My passion is assembling PC hardware, studying Operating System and all things related to computers technology. I also love to make short films for YouTube as a producer. More at about me…


Leave a Reply