
Due to the confidential data in your folders in Windows 10, you may need to protect your folders from being opened by someone else. To protect your folder in Windows 10, you may need to use a password. If you use a password to protect your folder, it means that you have to enter a password you set before to open the files in the folder.
In addition, you can also protect your individual files either in a password-protected folder or in a folder without password protection. If at this time you need a way to protect your folder with a password, you can dive into our post since we’ll show you how to password-protect your folder in Windows 10 without having to download third-party apps. Let’s check them out!

How to Lock Folders with a Password in Windows 10 Without Third-Party Apps?
Even though installing the third-party apps will be more robust for greater privacy, the simplest and easiest way, of course, does not involve any third-party apps since Windows 10 has this built-in feature.
If you want to lock folders with a password in Windows 10 without any third-party apps, you can do the following steps:
- First, right-click on the folder you want to password-protect.

- From the menu, you can click “New” à”Text Document.” Make sure to leave it without a name, you can instead name it when doing “Save as.”

- Double-click on the text file that you’ve just created to open the file. Then you must apply the following code to it:
cls@ECHO OFF title Folder Locker if EXIST “Control Panel.{21EC2020-3AEA-1069-A2DD-08002B30309D}” goto UNLOCK if NOT EXIST Locker goto MDLOCKER :CONFIRM echo Are you sure u want to Lock the folder(Y/N) set/p “cho=>” if %cho%==Y goto LOCK if %cho%==y goto LOCK if %cho%==n goto END if %cho%==N goto END echo Invalid choice. goto CONFIRM :LOCK ren Locker “Control Panel.{21EC2020-3AEA-1069-A2DD-08002B30309D}” attrib +h +s “Control Panel.{21EC2020-3AEA-1069-A2DD-08002B30309D}” echo Folder locked goto End :UNLOCK echo Enter password to Unlock folder set/p “pass=>” if NOT %pass%==Your-Password-Here goto FAIL attrib -h -s “Control Panel.{21EC2020-3AEA-1069-A2DD-08002B30309D}” ren “Control Panel.{21EC2020-3AEA-1069-A2DD-08002B30309D}” Locker echo Folder Unlocked successfully goto End :FAIL echo Invalid password goto end :MDLOCKER md Locker echo Locker created successfully goto End :End - In the code, you need to look for the text that says “Your-Password-Here.” After finding it, you need to replace it with the password you want.
- Upon finishing, you can click on File > Save As. In the “Save As” window, you need to change “Save As Type” to “All Files.”

- In the “File Name” option, you can name the file “FolderLocker.bat.” Then, click on “Save.”
- Close the.txt file and launch FolderLocker.
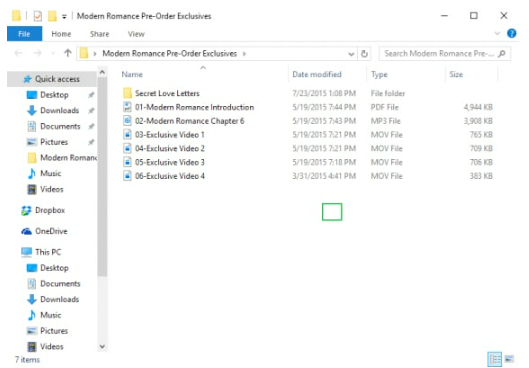
- You can now fill the folder with the files and data you want to protect.
- Once done, you can double-click the FolderLocker file to lock the folder again.
- Beforehand, you will be asked for confirmation; make sure to press the “Y” letter and then the “Enter” key on your keyboard.


Congratulations! The folder lock worked, and you can store your secret files in its password-protected folders-protected folders. It’s pretty easy to lock folders with a password in Windows 10 without having to install any third-party apps, isn’t it?
If you want to open the password-protected folder, you just double-click on the FolderLocker to open it. Then, you need to enter the password you created earlier and then press the Enter key on your keyboard.
How to Protect Data with Content Encryption in Windows 10?
It’s known that Windows has an encryption tool that works to prevent other users from opening your secret files. To use the encryption tool to secure your data in Windows 10, you can do the following steps:
- First, you need to right-click the folder you want to lock.
- Then, you need to select “Properties.”
- At the bottom of the “General” tab, you need to choose “Advanced.”
- Here, you need to check the box next to “Encrypt contents to secure data.”
- On the Properties window, you can then choose OK and then OK again to save it.
- Windows will then prompt you to back up your file encryption key to avoid permanently losing access to your encrypted files. Of course, you can either follow these steps or ignore them. If there is no prompt, you can skip ahead to the next section.
- If you followed the notification to back it up, you need to choose “Back up now (recommended).”
- In this step, you can start the Certificate Export Wizards by choosing “Next” on the first screen.
- Make sure to keep the defaults selected. Then, you need to press “Next.”
- Here, you need to choose the box next to “Password” to allow the password. Make sure to fill out the text fields below and choose “Next.”
- You need to select where to save the PFX file and give it a name.
- On the following page, you can choose “Next” to review the information you provided and “Finish” to complete the export.
- On the successful export prompt, you can choose OK.
Congratulations! You successfully secured your data through content encryption.

AUTHOR BIO
On my daily job, I am a software engineer, programmer & computer technician. My passion is assembling PC hardware, studying Operating System and all things related to computers technology. I also love to make short films for YouTube as a producer. More at about me…


Leave a Reply