The monitor calibration is very necessary for those of you who want to make color composition look more absolute on your Windows 10 computer or laptop. However, calibration can also solve some problems with your monitor, such as one that is too dim or too bright, which dazzles the eyes.
In addition, monitor calibration in Windows 10 will deliver the colors and black levels as accurately as possible. To calibrate your monitor on Windows 10, you can really use the Windows Color Management Settings. In addition to being used in Windows 10, you can also use the setting in Windows 7 and 8.
To learn how to use Windows Color Management Settings to calibrate your monitor in Windows 10, you can dive into our post below. Here you go!
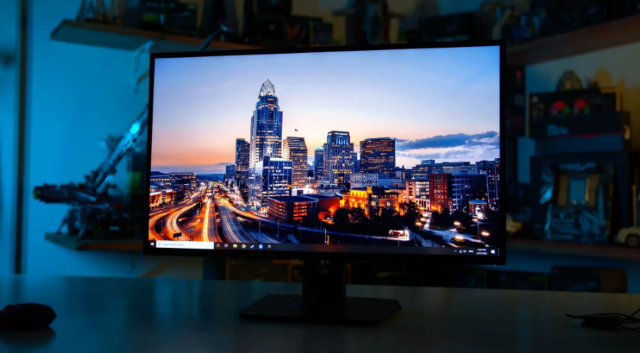
Calibrating Your Monitor in Windows 10: Here’s How!
Before you start to calibrate your monitor in Windows 10, you need to ensure your computer monitor has been on for at least half an hour. Of course, your monitor will be warmed up properly, and make sure to clean it.
After that, you can then start to calibrate your monitor in Windows 10 by following these steps:
First, you have to right-click on the desktop and click “Display Settings.”
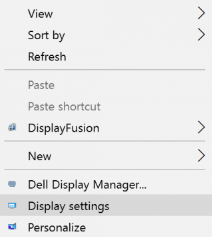
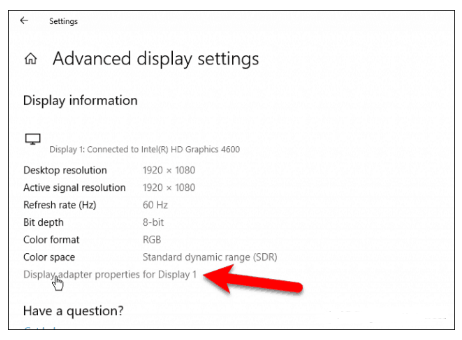
In the following windows, you need to click “Advanced display settings” at the bottom of the settings.

In the Advanced Display Settings, you need to click the “Display adapter properties for Display 1” link.
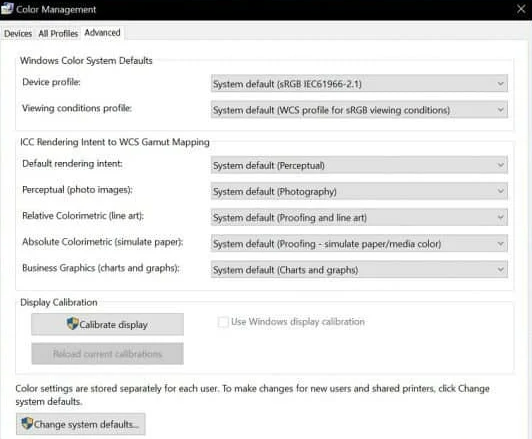
In the “Color Management” tab, you can click the “Color Management” button.

After that, choose the “Advanced” tab and click “Calibrate display.”
By clicking on it, it will show the “Display Color Calibration” wizard. You can click the link “How do I calibrate my display?” if now is your first time to calibrate your Windows 10 monitor.

For more information, Windows 10’s calibration will focus on a few areas, including:
- Gamma: It’s about how the colors green, red, and blue are projected on the screen to make up the color of an image.
- Brightness and contrast: It’s about how well elements appear in a picture without becoming washed out or too dark.
- Color balance: It’s about how accurately your monitor shows a particular shade of gray.
Then, you can click “Next” to begin adjusting.
Well, the Display Color Calibration Wizard will guide you through adjusting your monitor’s color settings, and you can:
- Set basic color settings before making changes. Well, it can normally be found on the side of your monitor. Then, click
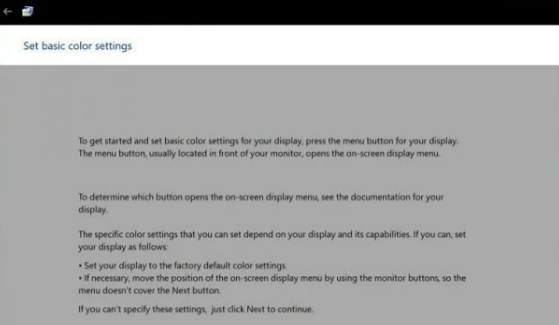
- Adjust your display’s gamma to match the sample image. You can move the slider to reduce the visibility of the faint dots. You can click “Next” or “Reset” and try again if you cannot discern a difference between the recommendations on the first page.


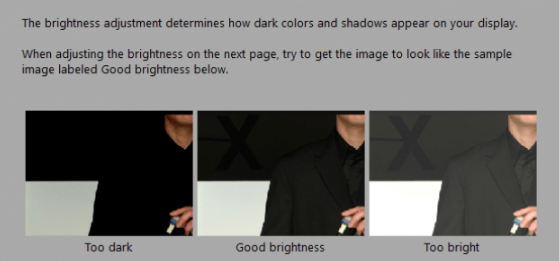
- Find and adjust the brightness and contrast. In this section, you may need to perform the calibration in an environment with natural light to get the best results. You can click “Skip brightness and contrast adjustment” if you do not have the option to adjust brightness. When it’s finished, click Next. You can repeat the same process for contrast using the sample image as a reference.

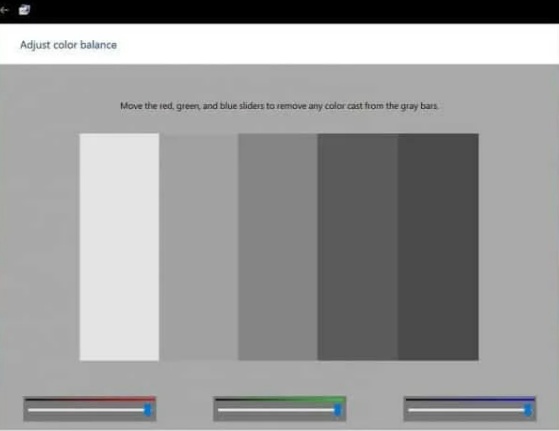
- Adjust the color balance. The wizard can help you adjust your display’s accuracy when displaying a particular shade of gray. Then, to begin, click Next. To make appropriate adjustments, you can use the sliders and click Next when complete.

After you have completed the color calibration, you can then compare your previous settings with the current modifications. Sure, you can always go back and make changes.
If the color calibration you’ve set is enough, you can click “Finish” at the end of the wizard to save the changes or cancel to preserve the previous settings.
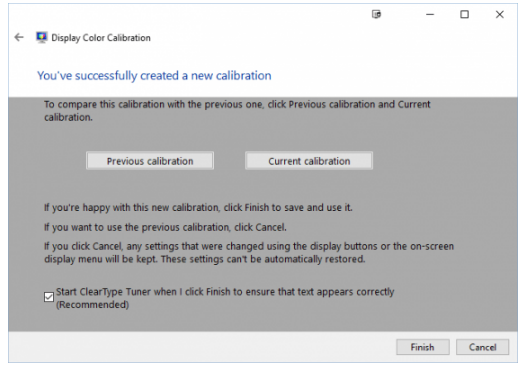
Congratulations! Your monitor has been successfully calibrated for a more accurate display. The color calibration on your monitor in Windows 10 also produces guaranteed true-life results when printing the content.
Furthermore, the built-in calibration tools may not be professional-grade, but at least they are a good start and complement to more professional calibrators. We hope the guide for calibrating your monitor in Windows 10 can really help you get the color levels as accurate as possible. Good Luck!!!
AUTHOR BIO
On my daily job, I am a software engineer, programmer & computer technician. My passion is assembling PC hardware, studying Operating System and all things related to computers technology. I also love to make short films for YouTube as a producer. More at about me…






Leave a Reply