
Deployment Image Servicing and Management, which is also known as DISM is short, is in charge of process of mounting, unmounting the Windows Image files while installing the important system updates. This one is the command line tool that is usually used in the background to deploy and mount the Windows image safely.
The opinion about the DISM Host Service process or DismHost.exe is divided into some. Some people think that it is an important component of Windows operating system, while some believe that that it is a malware pretending as a process.
Here are some fixes that you can try if you want to fix the DISM host servicing process high CPU issue:
Fix 1: Check if DismHost.exe is malware
There are a few different methods to check if the DismHost.exe on the system is a malware. The symptoms are mostly:
- The computer performance is slowing down
- Several copies of DismHost.exe are running.
- There are 100,000 of unknown files are created in \User\myname\appdata\local\temp.
- Some programs are running automatically.
- It is using 90 to 100% disk space.
- It is recreating itself each few minute in C:\Windows\Temp.
If you are currently facing the one or several issues mentioned above, it indicates that some malware is pretending as the DISM host servicing process on the system. It really needs your attention before the system is hitting big.
Running malware scanner is such a good idea if the system is under a risk. One of the most recommended is called Malwarebytes. This one can help you at taking action and getting rid of the malicious files.
Fix 2: Disable the Superfectch service on Windows 10
The first action to restoring the processing speed of the system is to disable the Superfetch service because in Windows, it consumes too much CPU usage, which causes you to face slow performance issues. Stopping it will upgrade the speed of the computer. Please follow these instructions to fix the issue:
- First of all, you will need to press Windows and R at once to launch the search window.
- Then, enter “service.msc” and press the Enter button to open the Services window.
- When it opens, find the Superfetch service.

- Once you have found one, right click on it and click on Properties to open the Superfetch Properties window.
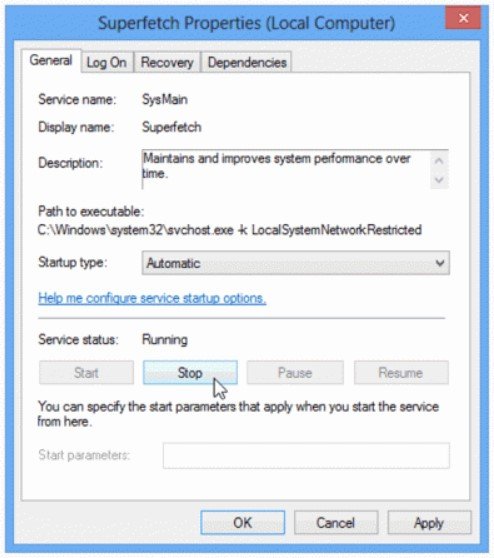
- After that, click on the Stop button.
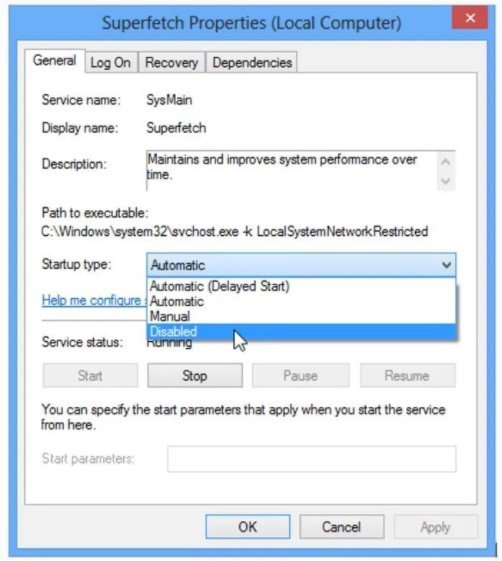
- Lastly, choose Disabled from the Startup type option menu and click the Apply button.
Fix 3: Disable the Background Intelligence Transfer of BIT service on Windows 10
One of the most recommended methods to fix the DISM host servicing process is to disable BITS service on the Windows OS. For those who are not familiar with the BITS service, it is the one that is used by the DISM host servicing process to transfer a lot of files over the internet. It consumes high internet bandwidth that makes your internet speeds slow down. To makes it better, here is everything that you will need to follow:
- The first thing that you will have to do is to press Windows and R key at the same time to launch the search window.
- Once it launches, type “service.msc” and hit the Enter button to open the Services window.
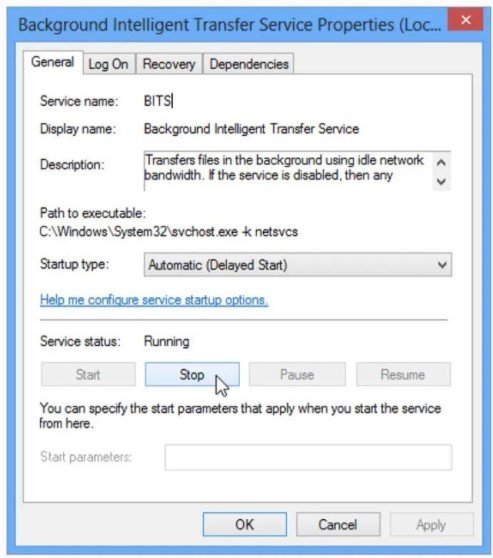
- Look for BIT service or Background Intelligence Transfer Service and click on it and open its Properties once you have found one.

- In the next step, click the Stop button.
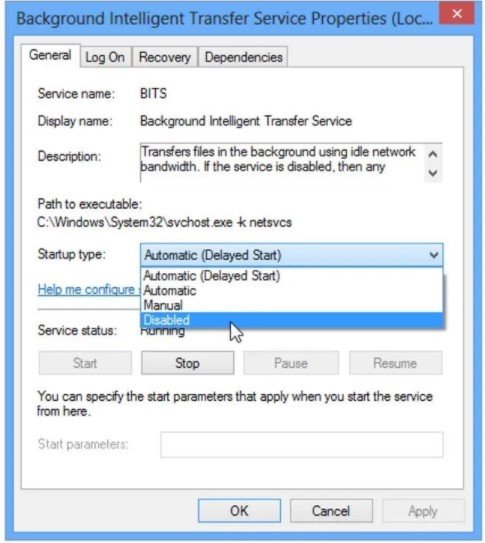
- Now, it is time for you to choose Disabled from the Startup type option menu and then click the Apply button.
- When everything is done, restart the computer.
Fix 4: Uninstall DIsmHost.exe on Windows 10
You will need to remove the process called DismHost.exe High CPU immediately if you find it in the Task Manager. In order to do so, follow these following steps:
- Firstly, open the Control Panel and click on Uninstall a program.
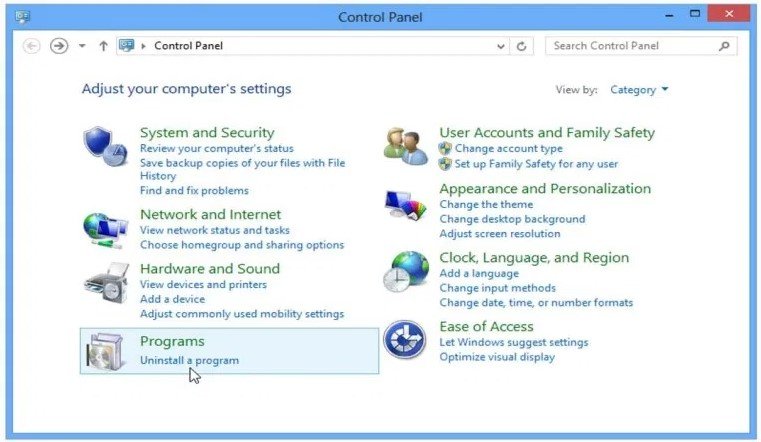
- Then, you will have to find the unwanted program. After finding one, right click on it and then click Uninstall to uninstall the program and disk or CPU usage should be restored to normal.
- After that, open C:/Program Files and locate the folder named DISM host servicing process. If you see nothing, it means the file has been successfully removed.
- Aside from that, you will also have to check the registry at HKEY_LOCAL_MACHINE to see if the DISM Host Servicing Process is there located under SOFTWARE. If you see one, please remove it. if you want to open the registry, you can just find the Regedit in the windows search bar.
In order to prevent for the same issue to happen in the future, there are some things that you should do regularly.
- You are suggested to keep Windows 10 updated. Please install the updates regularly every time there is one available to make sure that the system is not using the older version of DismHost.exe that might be the cause of the issue.
- Always check on the directories to detect any unnecessary and unknown files, folders, and programs.
- The last thing is to run a malware scanner to protect the system from the server failures that are caused by both viruses and malware.
Once again, DISM host servicing process or DismHost.exe can be described as a window command line tool that prepares windows PE for windows pictures. What makes it amazing is the fact that when it runs in the taskbar of the computer, it uses CPU, RAM, and also some other resources in the extreme level even when you do not use it.
A lot of people have reported this issue and think that it is a virus or a malware by seeing its weird behaviors. Actually, some experts think that is helpful for users but in fact it is not completely safe at all. If you think it harms your device, you can try the above methods.

AUTHOR BIO
On my daily job, I am a software engineer, programmer & computer technician. My passion is assembling PC hardware, studying Operating System and all things related to computers technology. I also love to make short films for YouTube as a producer. More at about me…


Leave a Reply