
Windows 7 is one of Microsoft’s operating systems that have been superior at its time. Currently, Windows 11 is the latest major release of Microsoft’s operating system that was released in October 2021. However, users who do not have a ‘low-spec’ PC or laptop may find it hard to run Windows 11.
In addition to taking more economical use of memory and disk space, Windows 7 also offers a clean and simple user interface. That’s why many users on the latest Windows want to return to using Windows 7 to support their work.

Can you return using Windows 7? Yes, of course! You can really return using Windows 7, though you’re currently using the latest Windows. Thankfully! This post will show you two smart ways to reinstall Windows 7 that we got from some sources from the internet, i.e., blog, forums, etc. Let’s check the tips out!
Things Before Reinstall Windows 7
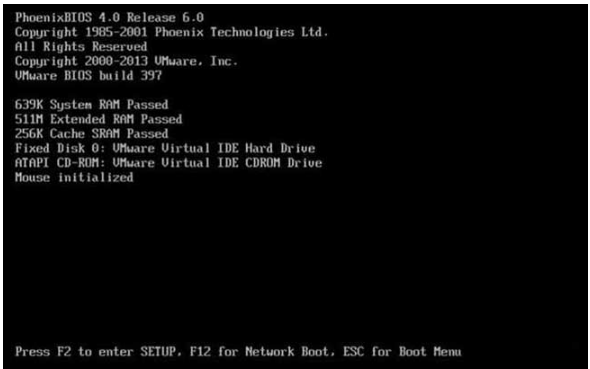
Before starting to reinstall Windows 7 using a CD or Bootable USB, you may have to set the initial boot in the BIOS menu first. This way is done to allow your PC or laptop to read the CD or bootable USB. To set up BIOS on your PC or laptop, you can do the following steps:
- First, turn on your PC or laptop you’d like to reinstall Windows 7 on.
- Then, go to the BIOS menu by pressing the F2 key. In some laptop brands, you may be able to press the Esc, F1, F10 or Delkay. Some laptops may require you to press the fn key and F1/F2 key together.

- Once you are in the BIOS menu, you need to set up the initial boot using the Boot tab menu.
- Choose the first boot to be a CD-ROM Drive or USB as you need.

- Here, you need to save the BIOS settings by choosing the Exit tab.
- If there is a pop-up window that says “Configuration changes and exit now?”, click Yes.
- By clicking it, your PC or laptop will automatically restart and reboot.
- Make sure to insert a CD or bootable USB that already contains the Windows 7 installer.


If your PC or laptop has restarted and set up the initial boot in the BIOS menu, you can then reinstall Windows 7 on your PC or laptop. Let’s see the guide to reinstalling Windows 7 by doing the two ways below!
Way 1: Reinstalling Windows 7 using a CD
The first way you can reinstall Windows 7 is by using a CD. This can only be done on a PC or laptop that has a CD-ROM drive. Here’s how to reinstall Windows 7 using a CD!
- First, insert the CD that contains the Windows 7 Installer into the CD-ROM drive.
- Then, turn on the PC whose BIOS is set to pre-boot to CD-ROM drive.
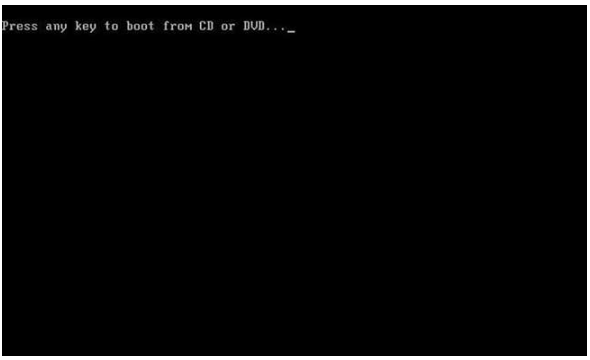
- The PC or laptop will initially boot. You may need to click any key on the keyboard quickly since it only takes 5 seconds. If you do not click it, your PC or laptop will restart again.
- Wait for a while for loading files process.
- Here, you need to enter the installation window and choose your preferred language.
- After you are happy with customizing these settings, you can click Next.
- Click Install Now to start the installation process.
- There will be a pop-up window of Microsoft Software License Terms. Make sure to accept the license terms by ticking I accept the license terms option and then click Next to start installation.
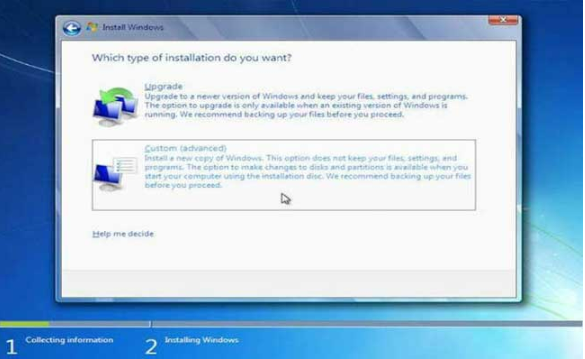
- In the following step, you need to choose Custom Advanced to make Windows 7 remove all old systems that look like a new system.
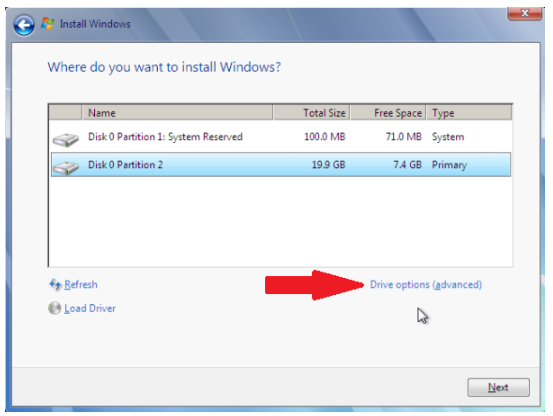
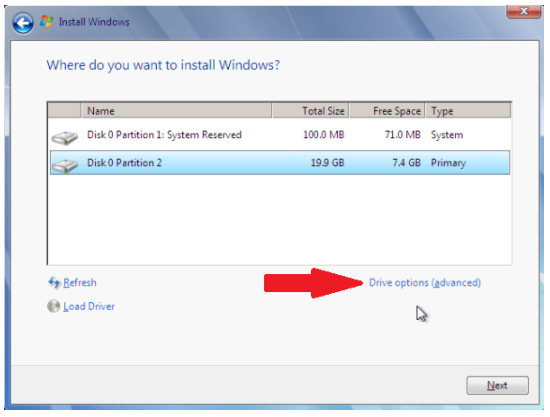
- Here, you will be required to create a partition on the harddisk. Make sure to click Drive Options (advanced).

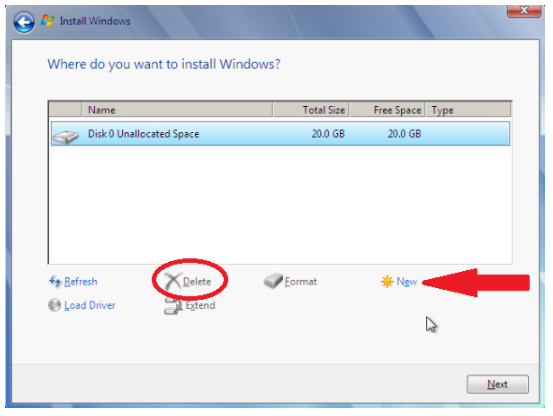
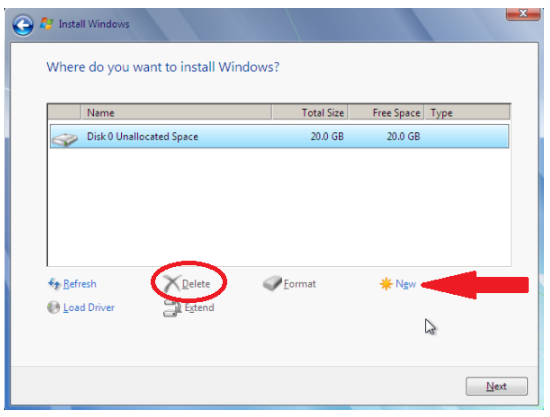
- Make sure to delete the existing partition in order to remove all old data.
- Then, you need to choose New to create a new partition for storing system files.You can select one partition or divide it into some parts. Then, click OK to accept.
- In default, Windows will create System Reserved partition.
- After the partition completes, you can click Next.
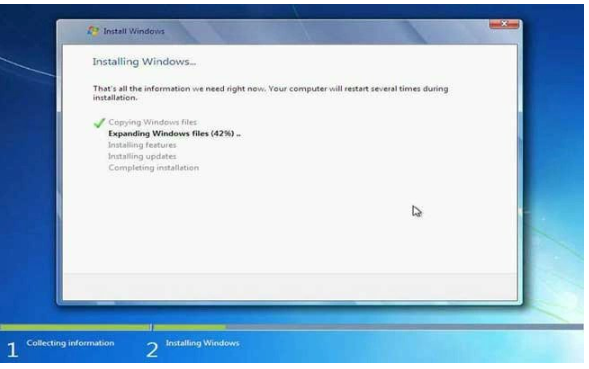
- Wait for a while for the process of Windows 7 file transfer and you can start the installation process.

- After the file transfer is complete, the installation process will continue automatically and your PC or laptop will restart itself.
- Don’t forget to remove the CD from the CD-ROM drive immediately.
- Since the installation process will continue, you don’t try to click anything. Just wait for the installation process.
- After the installation process completes, your PC or laptop will automatically restart.
- If Set Up Windows appears, you need to enter username and add password if you want.

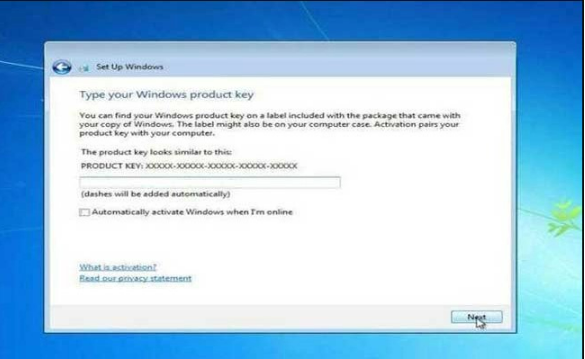
- Next, you need to enter Windows 7 Product Key. If it’s not available, choose Skip.
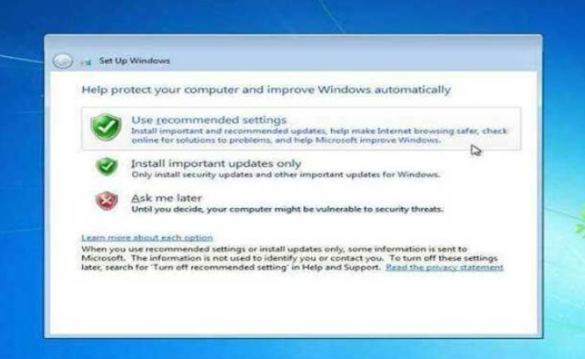
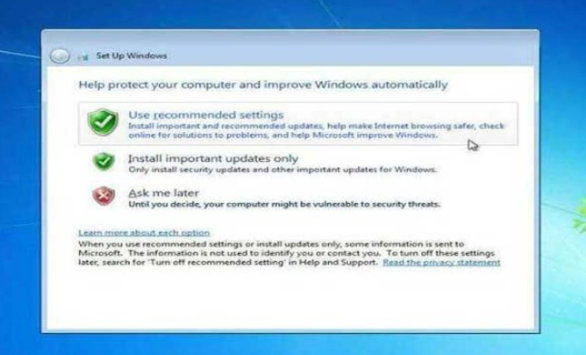
- In the next step, you need to select Use Recommended Settings.
- Last, you need to set up a date and time.


Congratulations! You’ve reinstalled Windows 7 on your PC or laptop. If you have a plan to reinstall Windows 7 on your PC or laptop, you can do the steps that we’ve explained above.
Way 2: Reinstalling Windows 7 Using Bootable USB
If you have a laptop without CD-ROM, you can choose to reinstall Windows 7 using a flash drive instead. To do it, you may need USB with 8GB memory storage or more. Never forget to download ISO Windows 7. If so, you need to change the flash drive to a bootable USB using Rufus.
After your flash drive is switched into bootable USB, you can do the following steps to reinstall Windows 7 using bootable USB. Here’s how!
- Plug in your flash disk that contains the Windows 7 installer into the USB port.
- Turn on your PC or laptop with BIOS set on for initial boot to flash disk/ removable disk.
- After that, your PC or laptop will start initial booting.
- You may need to click any key on the keyboard quickly since it only takes 5 seconds. If you do not click it, your PC or laptop will restart again.
- Wait for a while for loading files process.
- Here, you need to enter the installation window and choose your preferred language.
- After you are happy with customizing these settings, you can click Next.
- Click Install Now to start the installation process.
- There will be a pop-up window of Microsoft Software License Terms. Make sure to accept the license terms by ticking I accept the license terms option and then click Next to start installation.
- In the following step, you need to choose Custom Advanced to make Windows 7 remove all old systems that look like a new system.
- Here, you will be required to create a partition on the harddisk. Make sure to click Drive Options (advanced).

- Make sure to delete the existing partition in order to remove all old data.
- Then, you need to choose New to create a new partition for storing system files.You can select one partition or divide it into some parts. Then, click OK to accept.
- In default, Windows will create System Reserved partition.
- After the partition completes, you can click Next.
- Wait for a while for the process of Windows 7 file transfer and you can start the installation process.

- After the file transfer is complete, the installation process will continue automatically and your PC or laptop will restart itself.
- Don’t forget to unplug the flash disk from the USB port immediately. The installation process will continue.
- After the installation process completes, your PC or laptop will automatically restart.
- If Set Up Windows appears, you need to enter username and add password if you want.

- Next, you need to enter Windows 7 Product Key. If it’s not available, choose Skip.
- In the next step, you need to select Use Recommended Settings.
- Last, you need to set up a date and time.


Congratulations! You’ve successfully reinstalled Windows 7 using bootable USB. Now is a great time for you who have a plan to reinstall Windows 7 using bootable Usb, instead of using a CD.
After the installation process is complete, don’t forget to install other drivers, such as audio, graphics, network, etc. This driver is used to allow a laptop or PC to run optimally. That’s how to install Windows 7 using a CD or bootable USB. Good Luck!!!

AUTHOR BIO
On my daily job, I am a software engineer, programmer & computer technician. My passion is assembling PC hardware, studying Operating System and all things related to computers technology. I also love to make short films for YouTube as a producer. More at about me…


Leave a Reply