Usually, ISDone.dll error Unarc.dll error-12 appears when we are trying to install games. However, the code may vary, it can be -1, -7, -11, -12 or -14.
This error usually appears to video games or software that you want to download or install which need heavy graphics or animations.
So, how to get rid of this error? There are some methods that you are able to apply for fixing it as we will explain below.
Running Windows Memory Diagnostic Tool
- The first thing that you have to do is to click on the Start button.
- After that, you have to go to the Control Panel.

- Here, you must open Administrator Tools.

- And then, double click on Windows Memory Diagnostic.
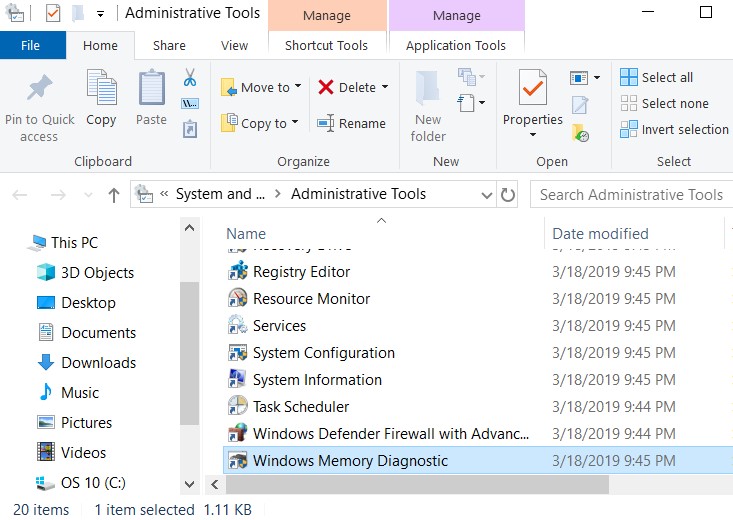
- It will bring you to Restart your PC now or later but requesting to save any unsaved data or files.

- If your PC is restarted, then you will see a blue screen displaying Windows Memory Diagnostic Tool with some progression.

- Now, you are able to try one more time after booting your PC and then see whether the issue is fixed or not.
Performing A Clean Boot
Performing a clean boot is another method that you are able to apply for fixing IsDone.dll error Unarc.dll error-12. How to do that? You are able to follow the steps below.
- First, you have to go to the Run command. There, you have to type msconfig and press Enter.
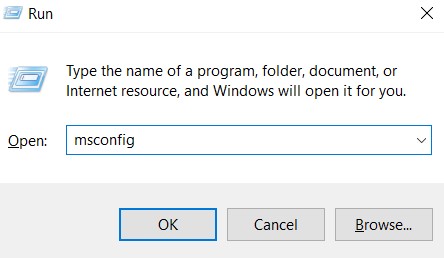
- After that, you will see that the System Configuration window will pop up.
- So, you have to go to the Service tab.

- Now, you have to give a tick in the checkbox named as Hide All Microsoft Services which is shown at the bottom of the list.
- Click the Disable All button which is shown at the right side.
- If you have done it, now go to Startup tab.
- Here, you have to click on the Open Task Manager option.
- And then, right click on every item which is displayed under Startup tab and then choose Disabled option.
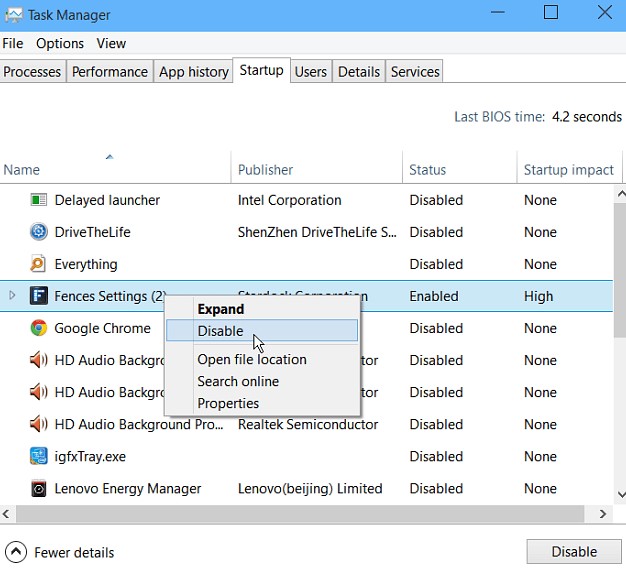
- Now, you are able to close the Task Manager and then click OK which is shown on the System Configuration window.
- It will bring you to restart your PC.
- So, restart it now and if your PC has been booted successfully, you are able to check whether the error has been gone.
Disk Cleanup
- If you want to fix this error by using disk clean up, the first thing that you have to do is to click on the Start button.
- After that, you have to type Disk Cleanup and then press Enter.
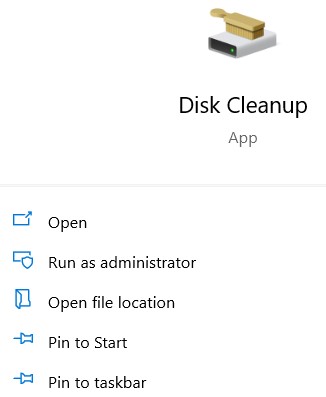
- In this step, you will see Disk Cleanup pop up window which will be opened with some progression.

- If the progress is completed, it will list down files to be deleted from various areas such as Recycle Bin, Temporary Internet files and many more.
- Here, you have to scroll down and then choose Temporary Windows Installation Files from the list and then click on the OK button.
- It will prompt you to delete the files permanently so that you have to click on the Delete Files button.
- If the process of cleanup is done, now you are able to try again to check whether the error is fixed.
It is important for you to know that sometimes all the unwanted windows installation files will not be deleted. So, if it happens, you are able to go to the command prompt and then you have to type the commands below.
Command 1 – takedown /F C:\$Windows.~WS\* /R /A
Command 2 – icacls C:\$Windows.~WS\*.* /T /grant administrators: game / applicationF
Command 3 – rmdir /S /Q C:\$Windows.~WS\
If you have typed the command above, then press Enter. Then, after doing it, you can check whether the error is gone.
Using User Compatibility Mode
Using user compatibility mode can be done to fix this error as well. How to perform this method? You are able to see the instructions below.
- The first thing that you have to do is to right click on the executable file/ application.
- After that, click on the Properties option and then go to the Compatibility tab.
- Here, you have to choose the checkbox written Run This Program In Compatibility Mode For option.
- Choose Windows 7 option from the listed items.
- And now, choose checkbox written Run This Program As An Administrator at the bottom.
- Click on Apply which is followed by the OK button and then run the executable file now.
Running Deployment Image Servicing and Management (DISM) Tool
- The first thing that you have to do is to access Command Prompt.
- There, you have to type the command below and then press Enter.
DISM.exe /Online /Cleanup-image /Restorehealth

- Don’t miss: What Are .DS_Store and __MACOSX Files?
- It is important for you to note that this process may take some minutes or even hours. So, you have to be patient while waiting for this process.
- If the process reaches 100%, you are able to restart your PC.
- And then, see whether the error is fixed or not.
Downloading and Pasting New DLL Files Under System 32 Folder
- The first step for doing this method is to download required .dll files from internet,
DOWNLOAD ISDONE.DLL: https://www.dll-files.com/isdone.dll.html
DOWNLOAD UNARC.DLL: https://www.dll-files.com/unarc.dll.html
You have to make sure that you download the files which are similar to your system type whether 32 bit or 64 bit.
- After that, you have to save these files on your PC.
- Now, you have to copy ‘Unarc.dll’ and/ or ‘Isdone.dll’.
- In this step, you have to go to My Computer and then open C drive.
- Go to Windows >> System 32 folder.
- Here, you have to search for the .dll files under System 32 folder.
- Rename then and then you have to append BACKUP text to those files for example, ‘unarc_BACKUP.dll’.
- Here, you have to paste the newly downloaded files under Windows >> System 32 folder. If your PC is 64 bit, you must paste the files under Windows >> SysWOW64 folder.
- Now, you have to restart your PC and if it gets restarted, you are able to check whether the error is fixed or not.
AUTHOR BIO
On my daily job, I am a software engineer, programmer & computer technician. My passion is assembling PC hardware, studying Operating System and all things related to computers technology. I also love to make short films for YouTube as a producer. More at about me…






Leave a Reply