
Sometimes you feel bored when you play Minecraft with the standard skin. So, you want to use or apply your custom skins in Minecraft. In this page, we are going to explain the way to apply or add your custom skins in TLauncher. If you want to do that, please read this tutorial.
Applying/Adding Your Custom Skin on TLauncher
Of course, firstly you need to download TLauncher on the main page to apply or add the skins on TLauncher. Then, you are able to follow these steps below:
- Firstly, you will need to register on the site in order to enable you to continue to use the login details in the launcher.
- Then, you are able to go to the registration page and enter the required data in the field.
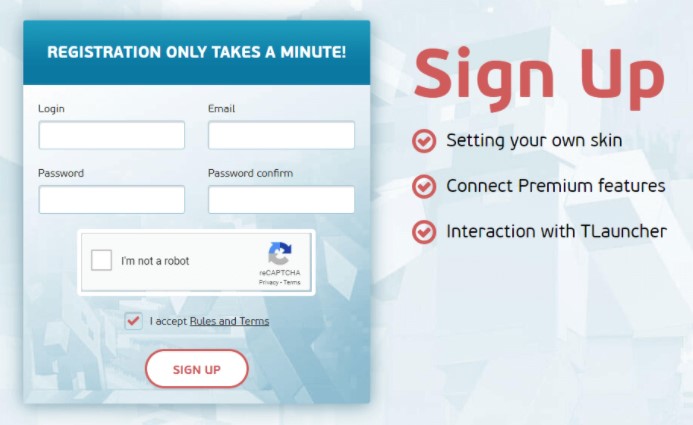
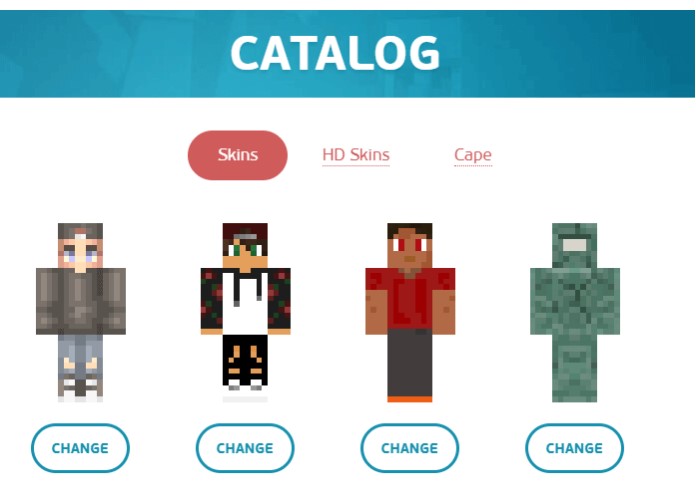
- After registration, you will have your own profile where you can install or add the skin.

- The next step, you are able to click Upload skin. Please choose your custom skin from your PC/computer. In this step, we highly suggest you to use a size of 64×32, unless you bought the Premium member with which it allows you to install HD skins.
- Please run TLauncher, and then install the box next to the Accounts. Click on the tab accounts in your case says “No accounts”, and then simply you are able to open the from list, and click “manage” go to the login page.

- On this page you have to submit your data specified during registration such as your username, password and Email address. For note, the Save button auto resume.
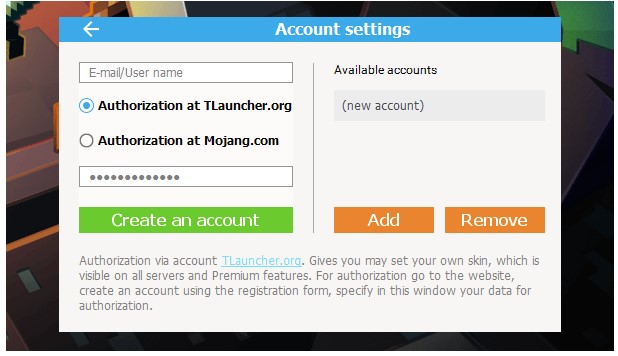
- If an authorization is successful, you will be able to see your username with an icon TL on the main page of the launcher.
- Lastly, you are able to select from the list any version with TL icon and run.
![]()
After you apply your custom skin on TLauncher site, now you are able to play the game with your own custom skin.
Applying/Adding Skins Via Ely.by
We get information that Tlauncher allows non-premium players to apply custom skins to their character without having a premium account. Simply, you are able to register on Ely.by and follow the tutorial below on how to add skins.
- At the first step, you have to login to your Elyby account.
- In the top left corner, please click the navigation menu to open the navigation menu.
- After that, you are able to choose tab Skins.
- On this page you will be able to find different skins, to use one simply you are able to click on the Checkmark button.
- To upload your own skin, just click Add skin.
- Please select between two options; Choose File or Upload by url.
- Now, you are able to choose a file and fill out fields and then save it.
- You will be able to apply skin by clicking on the Checkmark button.
For note: Sometimes it will take a few minutes before you are able to see updated skin. If you are playing the game while doing this, then you probably need to logout and login.
How to Change Your Minecraft Skins on PC
When you want to custom your Minecraft skin, of course you need to know the way to change your skin first. You do not worry as here we will explain how to do that. Please follow these steps below:
- You have to ensure the game is not running while changing your skin.
- Then, go to MinecraftSkins.com and simply choose from the millions of skins shared and uploaded by their community.
- After deciding on a skin, you are able to enter the skin page of your choice. You will be able to find the “Upload to Minecraft.net” button on the right side of the page. Just click on it.
- A new page is going to open up to Minecraft.net. Continue to log in to your account and you are going to see your chosen skin already loaded onto the “Upload Custom Skin” box. Please click on the “Upload” button.
- Finally, you are done. Just load up the game and you must be wearing your new skin.
To change your Minecraft skins on PC manually
- After entering the skin page of your choice, you are going to find the “Download” button on the right side of the page. Please click on it.

- The image skin file like this can be downloaded onto your PC.
- Now, you are able to go to https://minecraft.net/en-us/profile/skin and log in to your Minecraft.net account.
- After log in, you will see “Upload Custom Skin,” click on “Select a File”.
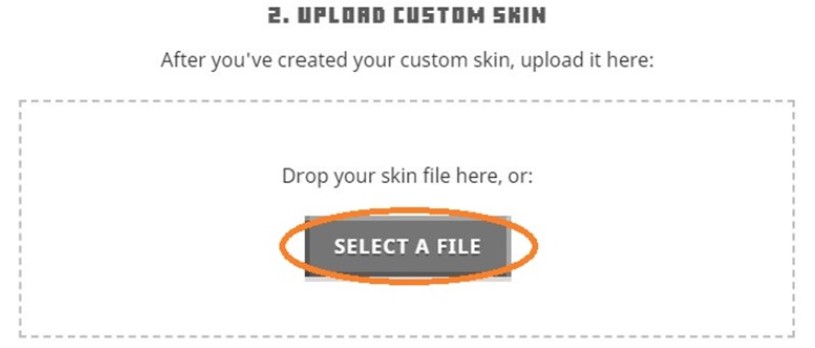
- A window pop up will pop up, please double click on the .png image skin file you have downloaded.

- You must see the skin file loaded onto the site. Simply, you are able to click on the “Upload” button.

Enabling The Skins Tlauncher to Their Own Version
In addition, you may want to display their system of skins to your own version of Minecraft, for instance when you installed OptiFine manually, as well as to assemblies downloaded with mods from the Internet. You have to perform a couple of paragraphs and all your skins can work. For the starters, we recommend installing OptiFine in your build if not, due to the fact that the skins work with him and appear much better. Also, use the latest version of launcher, and then download TLauncher on the main page. Warning: Your Minecraft client must be at least version 1.7.10.
- At first, you will need to copy your Assembly to the folder minecraft/versions/ for getting a similar path .minecraft/versions/ACE/, where ACE is the name of your Assembly.
- In this folder must be 2 files with the extension *.jar and *.json. In our case ACE.jar and ACE.json.
- Then, you have to open with a text editor the file *.json.
- Please leaf through to the end of the file and discover the line “skinVersion”: false (If it is not present, just run once from the launcher version). Next, change the value false to true.
- If you do all steps correctly, then in the launcher in the list, the icon can be TL, that signifies the working system of skins with this version.

AUTHOR BIO
On my daily job, I am a software engineer, programmer & computer technician. My passion is assembling PC hardware, studying Operating System and all things related to computers technology. I also love to make short films for YouTube as a producer. More at about me…


Leave a Reply