In this page, we are going to share how to add trusted sites in Chrome Mac. If you come to this page to find out that information, you are at the right page. Please read this entire article to get the information you need.
How To Add Trusted Sites in Chrome Mac
Method 1
- Type Address
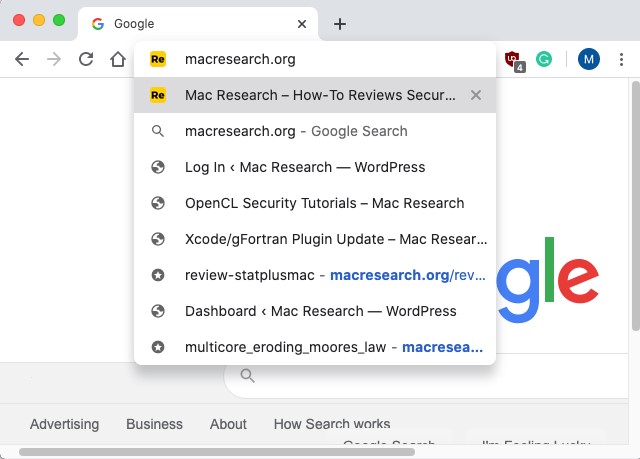
On the address bar of your chrome browser, you are able to type in the site you want to add to Trusted Sites.
- Certificate settings
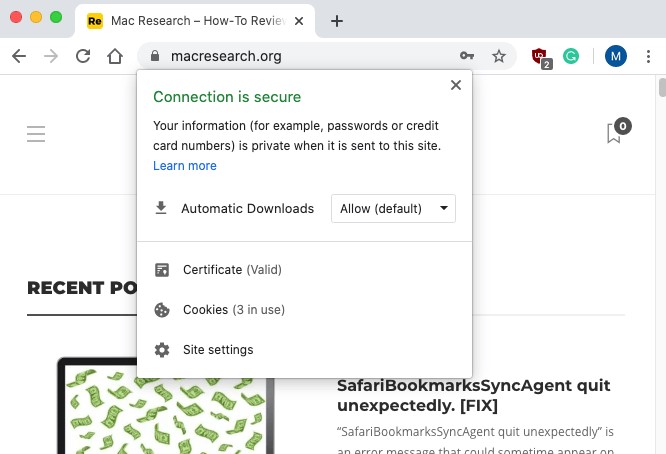
After that, you have to click the Lock icon next to the name of the domain and then go down to the Certificate options.
- Download Certificate
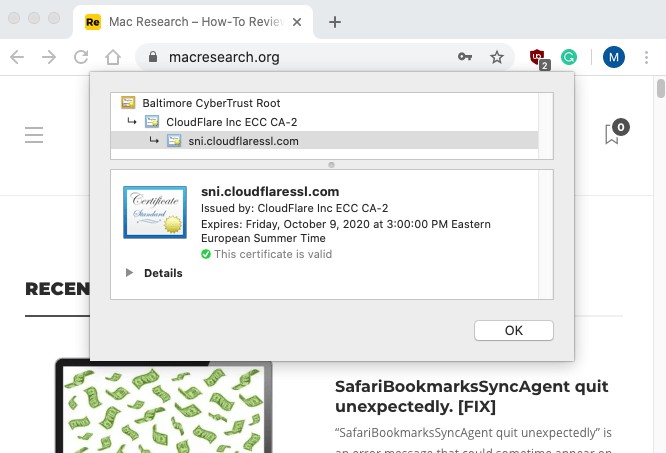
When in the Certificate options, you are able to choose the Certificate image and drag it to your desktop.
- Open Certificate
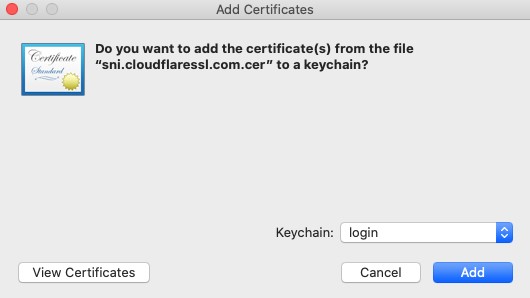
Now, you need to find the Certificate image which is located on your desktop. Please double click to open the Keychain Access window. Once prompted add your password.
- Keychain: System

From the Keychain drop down menu choose ‘system’ and click the add button.
- Choose Certificate
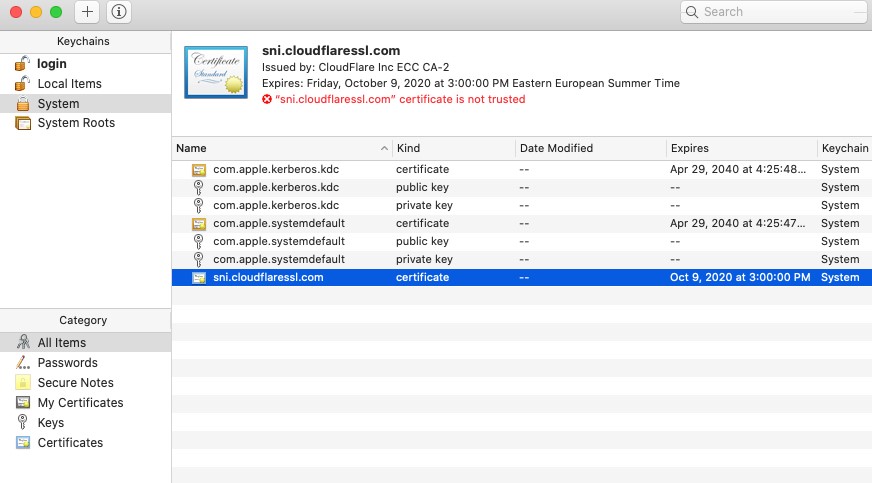
From the Keychains menu on the left, you have to click the system. When you see the certificate of the site simply double click on it.
- Always Trust

Afterwards, click on the triangle next to the word Trust, choose ‘When using this certificate’ -> Always.
- Close Certificate

Now, you are able to close the Certificate window, once prompted add password and the keychain window.
- Restart
Finally, you are done. Please restart your Chrome Browser and ensure that you have closed keychains.
Method 2
When you are using this method, the sites on the “Trusted Sites” list will not have cookies, notifications, or pop-ups blocked by your Chromes security settings. This method applies only for the Chrome browser for Mac. For your information, method 1 offers for more advanced access such as secure mail, SSL, IP security and code signing.
- The first step that you have to do is to open Google Chrome for Mac
- After that, you need to click on the three dot icon in the top right corner of the Chrome app
- Then, click Settings
- Please scroll down and click Show advanced settings.
- Now, you have to click Content settings. You are going to see the option below the Privacy heading.
- The next step is to click Manage exceptions.
- Please type the URL of the site.
- Ensure the Behavior settings says ‘Allow’. For your information, the Behavior setting is on the right side of the Window. If the Behavior setting says ‘Block’ or ‘Clear on exit’, you have to click the box and then click ‘Allow’.
- Afterwards, you are able to click Done.
Please repeat this process for other Chrome attributes. As you scroll down, you are going to see the headings such as below:
Pop-ups: This will be able to allow pop-ups regardless of your other Chrome settings.
Location: This will be able to allow you to access your location.
Notifications: The sites will be able to send you notifications related to the site’s content.
- Lastly, you only need to click Done.
Add a Security Exception For Trusted Sites on Chrome Mac
Probably, security is the one biggest problem when it comes to browsing with Chrome for Mac and using the internet as a whole. That is why there are many measures implemented to protect our most valuable data such as our passwords, financial information, login details, etc. One method of knowing whether you are about to visit a secure site is by having a look at the URL, that should contain the letters ‘https’. This informs your web browser that you will visit a secure website, and asks it to run a series of different checks to ensure that the site is secure. If the checks come back negative (e.g. the security certificate may have expired), then your browser will be able to display a warning before opening the respective page or website.
Usually, the warning will be informing you that your sensitive information can be stolen if you proceed to the URL in question. A good idea to heed this warning if this is the first time you are about to visit this web location. However, if you know for certain that you can trust this site, there is a method that you are able to visit it anyway and bypass the security error notification from your browser.
What are the benefits of enabling trusted sites in Chrome Mac?
The way to avoid the error message displayed by your Chrome web browser for Mac once there is a problem with the security certificate of a given site is by using the Trusted Sites feature. In this page, we tell you the advantages of this feature and how to use it to make the most of your browsing experience. It functions as an extra layer of protection on your Mac from any malicious programs.
The Trusted Sites feature in Chrome web browsers works fairly simple. You only need to add certain URLs to its list, in order to inform your browsing program that you trust said URLs. When you visit a site like this, Chrome for Mac can skip doing the regular security checks that it usually does. Therefore, you are also going to notice that because of this, your trusted sites will be able to load faster than others. For note: The plugins such as Java and Adobe Flash will be enabled automatically for your trusted sites. Even if they are usually disabled by default for all other websites.
Actually, there is a very nice reason for those specific plugins to be disabled by default, along with one named ActiveX. They have a history of causing problems and have been known to be a gateway for viruses and malware for years now. Those plugins have rather serious weak spots in their security which can make it easy for Trojans, and other hazardous code to infect a given computer. Therefore, browsers like Chrome, Java and Flash are disabled by default as a security measure. Of course, you are able to change this configuration for free.
AUTHOR BIO
On my daily job, I am a software engineer, programmer & computer technician. My passion is assembling PC hardware, studying Operating System and all things related to computers technology. I also love to make short films for YouTube as a producer. More at about me…




Leave a Reply