
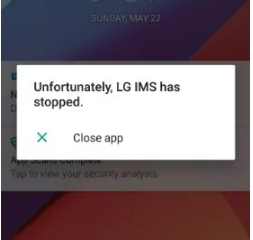
You may be in a situation where your Nexus 5X is stuck in a never ending bootloop. If so, you have to fix it by using the method that we provide below. However, before you fix the bootloop issue on your Nexus 5X, you have to unlock the bootloader first.
If you want to unlock your bootloader, you need to know that it will delete all your data on your phone. Also, it will return it to the out-of-box state. However, if you are sure with it, then you are able to follow the steps below to fix the bootloop on your Nexus 5X.

Things to Prepare To Fix Nexus 5X Bootloop
Before you start fixing Nexus 5X bootloop and unlock bootloader, you have to prepare the things that you need. What are the things that you should prepare? You are able to see in the list below.
- You need a Windows PC.

- You have to make sure that you have already unlocked the bootloader before you try the fix for Nexus 5X bootloop. If the bootloader is not unlocked, you have to enable OEM unlocking first. If you can boot into your phone, you are able to access the Settings and then choose the Developer Options and then you have to enable OEM Unlocking.
- You have to download the latest stock factory image for Nexus 5X.
- You have to download and install the LG USB drivers on your Windows.
- You have to install ADB and Fastboot driver.
- You have to download the Unblod.zip file.
If you want to know how to enable Nexus 5X OEM Unlocking if the device is in bootloop, there is a way to do that. You are able to drain the battery of the device and then you have to wrap the device in a plastic bag. You have to cool it down by putting it in the freezer. Now, you have to quickly connect to the charger and then try to Power On the device normally. You will see that your phone will work for 2 to 3 minutes and you must quickly access the Developers Option to turn on the OEM Unlocking and USB Debugging.
Steps to Fix Bootloop in Nexus 5X By Flashing Stock Image Using Unblod Tool
- First, you have to download the stock factory image of Nexus 5X and then you have to extract the zip file on your Windows PC/ Laptop.
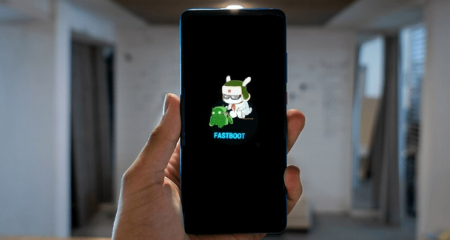
- Then, turn off the Nexus 5X and then start it in Fastboot mode by pressing the Power Button and Volume Down button together.
- Here, you have to connect the Nexus 5X device to the Windows machine with the USB connector.
- Then, go to My Computer and then choose Local Disk (C:) and then choose adb Folder. You have to make sure that you have downloaded and installed the adb drivers.
- You have to press Ctrl + Shift + and then right click on black space. You have to choose Open Command Window from the drop down selection.
- It will open a command prompt and you have to type adb devices and it will display a message which indicates that your Nexus 5X is connected.

- You have to hit Enter and then unlock the device bootloader by running the command fastboot oem unlock in the same command prompt window.

- You are able to use Volume Up/ Down buttons on your Nexus 5X and give access to unlock the bootloader.
- Now, the script execution will be done and the device will reboot.
- Here, we have successfully unlocked the bootloader of Nexus 5X.
- So, you are able to disconnect the device and then you are able to start it again the Fastboot mode to start flashing the stock image to fix the issue.
- You have to go to the extracted zip file and then you have to extract Bull-head-<build no.>.zip file.
- If you have extracted the zip file, you will find the boot.img file and then you have to copy and paste it on the desktop. You will need to access it later.

- Now, you have to extract the Unblod.zip file on the desktop which you have downloaded.
- Then, you have to double click the Unblod.exe file to open the Unblod tool.
- You have to tap Load and then choose the boot.img file that you have copied in the previous step.
- Then, you have to check Auto-flash after build box.

- Now, you have to connect Nexus 5X in bootloader/ fastboot mode to Windows machine.
- You must run and then wait for some minutes. You have to wait until Status turns Idle.
- At last, your device will restart and you will observe that the Nexus 5X bootloop issue has been fixed.
After you fix the Nexus 5X issue, there are several things that you need to remember. What are they? After flashing the boot.img file, it will take more time for the first boot. If it happens, you do not need to be worried. Just give it some time to do its work. Then, if your Nexus 5X is rooted previously, you have to root it again since you flashed the stock image. Also, you will have to unlock the bootloader again by following the steps above.
About Nexus 5X
Nexus 5X was launched in October 2015. The dimensions of this phone are 147 x 72.6 x 7.9 mm. Its weight is 136 g and its build is Gorilla Glass 3 in the glass front, plastic back and plastic frame. The type of display is IPS LCD which the size is 5.2 inches. How about the Resolution of the phone? It is 1080 x 1920 pixels.
How about the OS which runs on this android? The Operating System of this phone is Android 6.0 or Marshmallow and it is upgradable to Android 8.0 or Oreo. Its chipset is Qualcomm MSM8992 Snapdragon 808 (20nm). The COU is Hexa-core (4×1.4 GHz Cortex-A53 & 2×1.8 GHz Cortex-A57). The GPU is Adreno 418. The battery type is Li-Po 2700 mAH and it is non-removable.

AUTHOR BIO
On my daily job, I am a software engineer, programmer & computer technician. My passion is assembling PC hardware, studying Operating System and all things related to computers technology. I also love to make short films for YouTube as a producer. More at about me…


Leave a Reply