
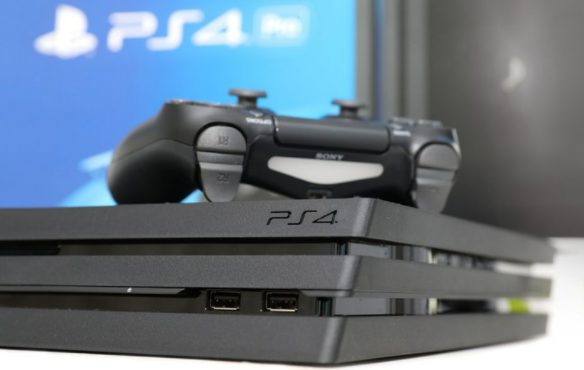
When you are running the Safe Mode on PS4, you may have difficulty getting out of this mode. if you get stuck in Safe Mode, you cannot really play the game as usual, as the Safe Mode only lets you run the most basic functions in your PlayStation.
Generally, you may use the USB cable to get out of Safe Mode. Sometimes, using the USB cable cannot solve the issue to get out of Safe Mode. Of course, you should look for other solutions to get out of the Safe Mode. Is there a way to get out of Safe mode without a USB cable? Let’s find out more solutions through our post below!
Getting Out of Safe Mode in PS4 Without USB Cable, Here’s How!
When your PS4 is in Safe Mode, your console will give you a bunch of options to get out of Safe Mode. Even though you don’t use the USB Cable, you definitely can take other solutions that we’ll show to you below. Here are they:
Solution 1: Restart your PS4
Restarting your PS4 is the fastest and easiest way to get out of Safe Mode. When your console is in Safe Mode, it will give you a bunch of options. Restarting your console is the first option that you can find.
To start restarting your console, you can just choose the ‘Restart PS4’ option. Then, you need to wait for your PS4 to reboot. If the rooting is successful, your PS4 system will be back to work normally. Otherwise, if your PS4 boots back into Safe Mode by restarting your PS4, you may need to take another solution.
Additionally, restarting your PS4 looks like it will reset your console’s memory. If you use this solution, it will shut down your PS4 and try to start it in the normal boot-up mode. If your PS4 boots back into Safe Mode with this option, your PS4 is still having the issue.
Solution 2: Rebuild corrupted files
If your PS4 is still in Safe Mode, the issue may be caused by a corrupted file. To get out of Safe Mode through rebuilding corrupted files, you can choose option 5 on the Safe Mode menu that says ‘Rebuild Database’ and then press ‘X’.
By choosing this option, it will build a new database for your PS4 without affecting any save data. To perform this option, it will take a while for your PS4 to rebuild the corrupted files. When it is done, you can then restart your PS4.
Solution 3: Update your PS4’s software
The option of ‘Update your PS4’s software’ will let you update your PS4 system software manually through direct download, disc or USB Storage device. Updating your PS4’s software will also be able to fix many bugs and issues on PS4.
If you want to get out of Safe Mode on your PS4, you can try to update your PS4’s system software from the Safe Mode menu, Then, you can press the ‘X’ to choose option 3 on the menu ‘Update System Software’. After that, press ‘X’ to choose ‘Update Using Internet’. From there, you can follow the instructions on the screen.
Solution 4: Initialize PS4 (Reinstall System Software)
If there’s no option that works to get out of Safe Mode on your PS4, you can try to choose option 7 that says ‘Initialize PS4 (Reinstall System Software’. You can then press ‘X’ and follow on-screen instructions.
Okay, those are all the solutions that you can take to get out of Safe Mode without using USB cable. If you try all the options, it should lead your PS4 to get out of Safe Mode as soon as possible. Now, you can try to take some solutions that we’ve shown above. Good Luck!!!
Learn the Function of Each Option in Safe Mode on Your PS4
It is known that there are eight options that you will find when your PS4 is in Safe Mode. For the function of the 4 options, we have mentioned above. So, in this section, we will explain the remaining four. Here they are:
Option 1: Change Resolution
If you choose the ‘Change Resolution’ option, it will set your PS4 display resolution to default 480P when it is back to normal mode. This option also helps you to fix your PS4 display screen issues, like the common blank screen problem.
Sometimes, you may face the problems on a mismatched resolution like you choose a higher resolution 1080p for your 720P TV, and also on HDMI connections between your TV and PS4. You can then use this option in Safe Mode to help you fix it.
Once you end your PS4 Safe Mode and put it into the normal one with 480P resolution, you can go to the Settings menu to set it to the appropriate resolution.
Option 2: Restore Default Settings
When you choose the ‘Restore Default Settings’ option, it will bring you back to factory default settings. You shouldn’t worry, it will not wipe your PS4 any data since it is not a complete factory reset. Only the settings like the time, date, etc will be reset with this option. However, it is a great choice for you to solve some potential issues with your PS4.
Option 3: Initialize PS4
Keep in mind, when you choose ‘Initialize PS4’ option in Safe Mode, it will remove all your PS4 game data, screenshotted images and all the other content including your system settings. Of course, you should back up your data to an external hard drive first before choosing this option.
Option 4: Set HDCP Mode
HDCP stands for High-bandwidth Digital Content Protection that is commonly used to encrypt the contents of an HDMI video stream that comes from an HD Video device. It is important to note, this option is only for PS4 Pro that lets you apply images that do not appear on 4K TVs that are not compatible with HDCP 2.2. Additionally, this option also lets you choose HDCP 1.40 to view images that otherwise will not appear on your TV.

AUTHOR BIO
On my daily job, I am a software engineer, programmer & computer technician. My passion is assembling PC hardware, studying Operating System and all things related to computers technology. I also love to make short films for YouTube as a producer. More at about me…


Leave a Reply