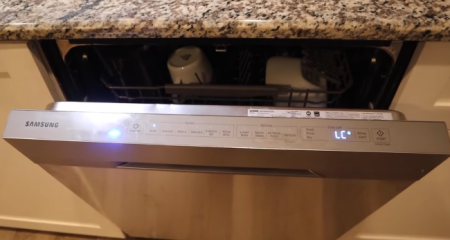
For those who want to find out the way to instal Samsung Dishwasher DW80R5061US, you are able to read this article till the end. Here we are going to explain how to install Samsung Dishwasher DW80R5061US.
Installing Samsung Dishwasher DW80R5061US
Here are steps to do:
Step 1 – Check the parts and tools
-
- Before starting on the installation Samsung Dishwasher DW80R5061US, you have to prepare all the necessary tools and parts needed.
Step 2 – Select the best location for the dishwasher
If this is a new installation, please follow these steps:
-
- Use a 2 ½ inch hole saw, then cut a hole into the side of the cabinet which holds the sink.
- You have to make a hole in the base inside the cabinet if the base inside the sink cabinet is raised above the floor of the kitchen or higher than the connections on your dishwasher.
Step 3 – Check water supply requirements
-
- Make sure that the hot water supply line is between 20 – 120 psi.
- Adjust the water heater to deliver water between 49 ˚C – 65 ˚C.
Step 4 – Check the electrical requirements
In the United States, you have to install in accordance with the National Electric code and Municipal or local codes. For cable direct connections and for power cord connections, simply you are able to see that information from the book of installation guide.
Step 5 – Unpacking and inspecting the dishwasher
You are able to unpack your dishwasher in an open area. You should retain all of the packing materials until your dishwasher is fully installed and operational so that you are sure that you have removed all the components of the product from the packing materials.
Step 6 – Preparing the dishwasher
-
- Make sure that the circuit breaker and water supply valve are turned off before proceeding with these steps.
- You need to wrap Teflon tape on both sides of the 90˚ elbow. After that, insert the elbow into the inlet valve. Please tighten until the elbow is tight and pointing towards the water hose channel in the base of the dishwasher.
- Now, you are able to cut the strings securing the drain hose to the back of the dishwasher.
- Please remove the junction box cover using a screwdriver, and then Install the strain relief. Ensure to keep the junction box cover you removed.
- If the countertop is created of wood or a material which is not damaged by drilling, attach the two Installation brackets which were supplied with the dishwasher using the supplied screws.
- Use clamp to connect the provided drain hose to the outlet at the back of the product. If the product has the drain outlet in the right side, you are able to use the provided holder hose to facilitate the connection.
Step 7 – Placing your dishwasher and connecting the hot water supply line
-
- Firstly, you have to set the three leveling legs after measuring the height of the cabinet.
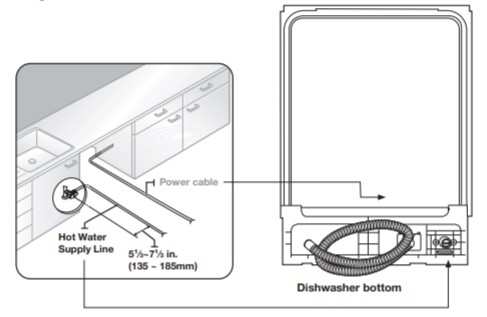
- After that, you have to find the hot water supply line and the power cable.
- Make sure that the hot water supply line is in the left channel. And the power cable is in the right channel of the base of your dishwasher. In this case, you are able to use duct tape to secure the water line.
Step 8 – Leveling the dishwasher
Before you move the dishwasher for installation, you have to ensure to adjust the height of the legs so the legs are as short as possible. This will prevent the legs from breaking. Please level the dishwasher by adjusting the height of the legs after you have the dishwasher in place.
Step 9 – Securing the dishwasher
You have to fix the dishwasher to the countertop or cabinet side walls for additional stability and safety. For note: Make sure that the tub is not distorted by pressure from the screws. If the tub is distorted, just loosen the screws a little. Then, replace the tub spacer caps.
Step 10 – Connecting the drain hose
-
- You have to check the parts on the sink to which the drain hose will be connected.
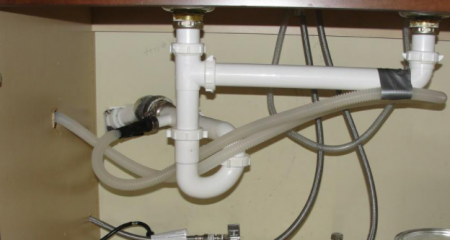
- Then, you are able to insert the drain hose into the drain hose connector of the sink. You have to connect the drain hose depending on the water pipe installation regulations in your area.
- After that, check the size of the sink’s drain hose connector.
- Please slide a hose clamp over the end of the drain hose. Then, simply you are able to attach the drain hose to the sink connector. Do not forget to slide the hose clamp to the end of the hose, and then tighten the hose clamp.
- Ensure to hang the middle of the drain hose properly above the sink cabinet base.
Step 11 – Wiring connections
-
- Before connecting the power cable to the dishwasher, ensure that the circuit breaker is off.
- In the junction box, find the three power wires from the dishwasher including the grounding line.
- You are able to pass the power cable through the strain relief, and then into the junction box.
- You have to connect the black wire of the dishwasher to the black wire of the power cable. Then, rotating the wire connector. Please connect the white wire to the white wire and the green to the green.
- Do not forget to recheck each wire to make sure it is connected properly and securely.
- Please replace the junction box cover on the dishwasher.
Step 12 – Completing the installation
-
- You have to remove all foam, paper packaging, and also unnecessary parts.
- Now, you are able to turn on the circuit breaker that you turned off before you began the installation.
- Then, open the water supply valve to supply water to the dishwasher.
- Turn on the dishwasher, and then choose and run a cycle.
AUTHOR BIO
On my daily job, I am a software engineer, programmer & computer technician. My passion is assembling PC hardware, studying Operating System and all things related to computers technology. I also love to make short films for YouTube as a producer. More at about me…


![GE Dishwasher Not Draining at End of Cycle [Troubleshooting]](https://www.alfintechcomputer.com/wp-content/uploads/2022/02/GE-Dishwasher-Not-Draining-at-End-of-Cycle-Troubleshooting-450x240.png)


Leave a Reply