
You may want to check the leak sensor of your Samsung dishwasher DW80N3030US, but you may not know the location of it. Here, you may find the answer of it. So, let’s read it below.
The Location of Samsung Dishwasher
According to Sears Parts Direct site, leak detector sensor (part number DD81-02287A) attaches to the dishwasher base and communicates with the control board if water is detected by it. It is also explained that before you install this part, you have to unplug the dishwasher or sut off the house circuit breaker. When you do something with it, you have to wear work gloves so that your hands are protected.

In the Teppermans site, it is also explained that leakage sensor can be found below the dishwasher so that it can detect small traces of water.
To know more where exactly the location of it, you are able to ask Samsung moderator or access Samsung community forum to ask other users.
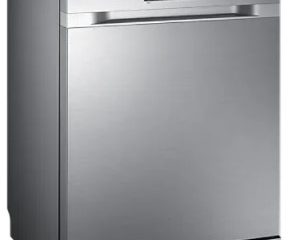
Specifications of Samsung Dishwasher DW80N3030US/AA


If you access Teppermans website, you will find that the price of Samsung Dishwasher with third rack DW80N3030US/AA is $699.99. Now, how about the specifications? You are able to read the details below.
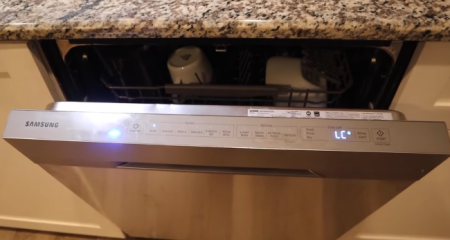
A 3rd rack gives a dedicated space at the top for small and light items like utensils and cutlery. Besides, this also frees up more space in the rest of the dishwasher for other items. You are able to take control with one touch by using a fully integrated Touch Control panel with soft touch technology. You are able to choose functions with a gentle touch and check the status of each cycle. With it, you can create a modern kitchen style with a look which is clean and minimalist.
This dishwasher has the hybrid tub which has a stainless steel door interior which is durable, clean and quiet. As explained earlier, you are able to find leakage sensor below the dishwasher. It can detect small traces of water. If there are any leaks are found, it will stop the cycle, drains water and shows an error message.
It also has the Height Adjustment feature which permits the upper rack to be moved up or down by an extra 2 inches to make more space in the lower rack. So, if you want to clean all pots, wide platters, and oversized plates will not be a problem anymore. This dishwasher also has the Auto Cycle feature. What is it? It ensures that your dishes are cleaned efficiently. It will detect how dirty they are and then select the optimal cleaning cycle automatically.
There is also a Hybrid Tub with a stainless steel inner door. It is designed to create less noise. It is able to absorb much of the sound and vibration when it is working. So, it will work quietly. It works at 51 decibels so that it is quieter than a normal conversation. As a result, it is more friendly environmentally while spending less as well. This Samsung dishwasher is Energy Star certified. It means that if you buy this dishwasher, you save money using less energy and water with each cycle without having to sacrificing performance or functionality.
This Samsung DW80N3030US/AA dishwasher has dimensions as like this.
W: 23.75” | D:24.75” | H: 33.75”
W: 60.33 cm | D: 62.87 cm | H:85.73 cm
This dishwasher’s weight is 81.57 lbs/ 37.0 kg. There is no stainless steel tub and the dishwasher type is built-in. It has delayed start and the control location is in the front. There is also child lock. The control type is front touch and there is no hard food disposer. The noise level is 51 dB as explained earlier and the number of cycles is 4.
The Steps to Replace Leak Sensor in Samsung Dishwasher
You are able to watch a video of RepairClinic.com entitled Samsung Dishwasher Leak Sensor Replacement #DD94-01062A to know th steps of how to replace Samsung Dishwasher Leak Sensor. Here are the steps based on that video.
- If you want to replace the leak sensor in your dishwasher, uninstalling the appliance must be done first by turning off the power to your dishwasher.
- The water supply valve must be shut off as well.
- Now, you have to use a phillips-head screwdriver to remove the screws securing the lower access panel. And then, remove the panel.
- By using a 5/8th inch wrench, it can help unthread the water supply line from the inlet valve be prepared for some water to spill.
- Next thing to do is to unthread the screw securing the junction box cover and then pull the cover off.
- You have to note the wires’ location then untwist the wire nuts to disconnect the wires.
- After that, you must unthread the strain relief nut and detach the strain relief from the junction box.
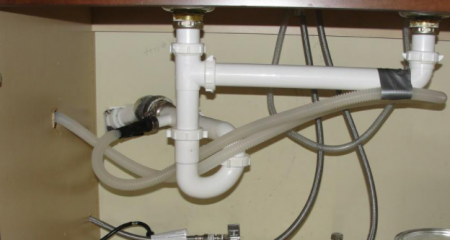
- Now, you must disconnect the drain hose from the sink drain or garbage disposer and then feed it through the cabinet.
- You have to open the dishwasher door and the mounting bracket screws must be removed.
- If you want to move the dishwasher, you may have to adjust the legs to lower the appliance.
- You are able to lower the rear leveling leg. You can do it by using a 9/64th inch hex-head screwdriver to rotate the adjustment rod at the front clockwise.
- Now, you have to pull the dishwasher away from the cabinet and you have to do this carefully.
- You have to tip the dishwasher back so it rests on its rear panel.
- You have to use the phillips-head screwdriver to unthread the screws securing the bottom access panel.
- Now, you must pull the panel forward and disconnect the leak sensor wire connecter.
- You have to unthread the screws securing the old leak sensor to the panel.
- You must Install the new leak sensor and you can do that by aligning it on the access panel and replacing the screws to secure.
- And now, you must connect the wire connecter.
- You have to reposition the access panel on the base and snap the retaining tabs into place.
- You must rethread the screws to secure.
- And now, the dishwasher must be returned to its upright position.
- You must make sure the drain hose is accessible through the cabinet wall and that the water supply and power supply lines are positioned in their respective channels in the dishwasher base then gently slide the dishwasher back into the cabinet.
- You have to adjust the leveling legs if necessary.
- You must replace the screws to secure the mounting brackets to the cabinet or countertop.
- You have to feed the drain hose through the cabinet and then you must connect it to the sink drain or disposer.
- You have to make sure that the hose is elevated above the connection point.
- Now, you have to fully position the wire strain relief in the junction box and secure the strain relief nut.
- By using the wire nuts, you must connect the wires.
- Now, align the cover and the screw must be replaced to secure.
- You have to reconnect the water supply line to the inlet valve.
- The lower access panel must be replaced and secure it with the screws.
- With the repair completed, you have to turn the water supply back on and also the power. And now, your dishwasher is ready to use.

AUTHOR BIO
On my daily job, I am a software engineer, programmer & computer technician. My passion is assembling PC hardware, studying Operating System and all things related to computers technology. I also love to make short films for YouTube as a producer. More at about me…
![GE Dishwasher Not Draining at End of Cycle [Troubleshooting]](https://www.alfintechcomputer.com/wp-content/uploads/2022/02/GE-Dishwasher-Not-Draining-at-End-of-Cycle-Troubleshooting-450x240.png)


Leave a Reply