There are a few factors that can cause the MSI Gaming OSD 2.0 not working, ranging from a bug in the software to an outdated driver. Here are some recommended troubleshooting methods that you need so that you can fix this issue.
Before trying any of these following methods, you are recommended to try restarting your computer first. refreshing your computer will refresh the operating system as well as removing the corrupt temporary data. Aside from that, it is also quite effective in fixing most software related issues.
Fix 1: Get the newest version of the MSI app
For those who are using an outdated version of the app then it could cause some issues, especially if your computer just recently installed a new Windows update. If you want to make sure that the issue is not caused by the compatibility issues you will need to uninstall the app and then install the newest version of it, which is able to be downloaded from the official website.
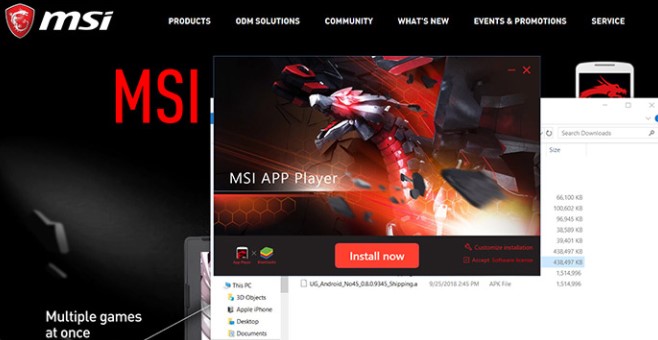
The first thing that you need to do is to click on the Start button on the gear icon to open settings. Then, click on Apps to immediately open a list of all installed programs on your PC. The next thing is to find the MSI Gaming Center and click on Uninstall.
Please click Finish when the uninstaller process is done and restart your computer. After that, go to https://www.msi.com/support#support_download. When you are there, navigate under the Select Your Product screen to look for your laptop or Desktop computer.
You will have to enter each relevant information about the setup until you reach the support page for your device. After entering everything, click the Download button that is able to be found at the left side menu and navigate to the Utility Scroll down until you reach the MSI Gaming App entry.
The last thing that should be done is to click the red download icon next to its name to initiate the downloading process. Then, find the file in the Downloads folder, right click on it, and select to Extract Run the installer and follow the guide on the screen.
Fix 2: Run the MSI gaming app as an administrator
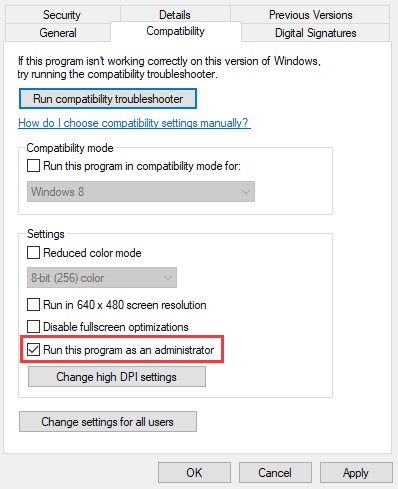
There are some examples when a software will need an elevated permission to run well. Please try to run the game as an administrator and then check if the issue is still there. Firstly, find the MSI gaming app and then change its properties by right clicking its entry either on the Desktop, the Start menu or the Search results window and select Properties.
After that, you will have to navigate to the Compatibility tab in the Properties windows and check the box beside the Run this program as an administrator option before applying the changes. Do not forget to confirm any dialogs which may show up for you to confirm with admin privileges and MSI gaming app should launch with admin privileges from now on. Please open it by double clicking its icon.
Fix 3: Reinstall the Microsoft Visual C++ Redistributable
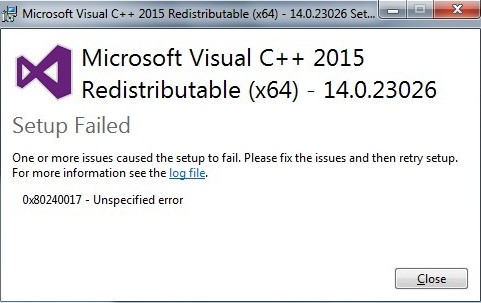
For those who have a corrupted version of the Microsoft Visual C++ Redistributable, then it could be the culprit of the issue. Reinstalling this one may help solving the issue. Please follow these instructions to reinstall the Microsoft Visual C++ Redistributable. First, click on the Start button and then click on the gear icon to open settings.
Second, click on Apps to immediately open a list of all installed programs on your PC. Third, locate the Microsoft Visual C++ Redistributable package and click on Uninstall after clicking it once. You may see that there are some different versions of the utility.
Please note all of them and repeat the uninstalling process for every of them. Fourth, click the Finish button when the uninstaller is done with the process and repeat the installation process for all versions of the Microsoft Visual C++ package. Fifth, go to hpps://support.microsoft.com/en-us/help/2977003/the-latest-supported-visual-c-downloads.
Sixth, choose the version that you want to download and select the download according to your processor. Seventh, find the file that you just downloaded in the Windows folder, run it, and then follow the steps on the screen to install the Microsoft Visual C++ Redistributable package.
Seventh, click on the Start button and then click on the gear icon to open settings. Eighth, click on Apps to immediately open a list of all installed programs on your PC. Ninth, find the MSI Gaming Center and click on Uninstall.
Then, click Finish when the uninstaller process is done and restart your computer. Eleventh, go to https://www.msi.com/support#support_download. Twelfth, navigate under the Select Your Product screen to look for your laptop or Desktop computer.
Thirteenth, enter every relevant information about your setup until you reach the support page for your device. Do not forget to download the Download button located at the left side menu and navigate to the Utility Scroll down until you reach the MSI Gaming APP entry.
Fourteenth, click the red download icon beside its name to initiate the downloading process. Find the file in the Downloads folder, right click on it, and select to Extract Run the installer and follow the steps on the screen.
Fix 4: Reinstall the driver

- Don’t miss: Best Manual Instructions How to Download Printer Drivers in Windows 10 from site microsoft.com
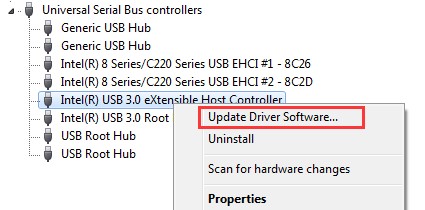
In case you are still facing the error that prompts you to reinstall or update a certain driver even after trying all the methods mentioned above, then you should try reinstalling the driver. First, type Run on the search bar.
Second, type “devmgmt.msc” in the run dialog box and press the Ok button to open the Device Manager. Third, expand the category where you think the driver that causes the issue is located. Fourth, right click on it and select the Uninstall device option.
Fifth, confirm the uninstallation process if needed by checking the box next to Delete the driver software for this device option and hit the OK button. Sixth, restart your computer for the change to take effect. Seventh, open Device Manager if Windows does not replace the driver automatically.
AUTHOR BIO
On my daily job, I am a software engineer, programmer & computer technician. My passion is assembling PC hardware, studying Operating System and all things related to computers technology. I also love to make short films for YouTube as a producer. More at about me…






Leave a Reply