
If you want to create a Roblox GFX, you can use Blender. Do you know how to use Blender to create a Roblox GFX? You are able to read the way to create a Roblox GFX using blender below step by step according to Stealthy Gaming.
The Things Needed for Making Roblox GFX
According to Stealthy Gaming, here are the things that you need for making Roblox GFX.
- You need a good laptop or computer and it is recommended for you to use a dual-core 2ghz CPU, 4 GB RAM and a graphics card with at least 1 GB RAM.
- You need Roblox Studio.
- You need Blender 3D software.
- You need Adobe Photoshop or a free picture editing program.
Steps to Create Roblox GFX
Here, you must have created your model in Roblox Studio. According to Stealthy Gaming, here are the steps to make Roblox GFX after you have created your model in Roblox Studio.
- First, you must go to the Toolbox. The Home tab ust be clicked and then you must hit the Toolbox button.
- After that, you need to explore properties. You must click on the View tab and then you must select Properties and then check out the various features.
- Now, you are required to load your character. To upload your avatar, you must access the Home tab and then click the Play button.
- Here, you must access the Workspace menu. In the Explorer tab, you must open up the Workspace menu and you have to discover your avatar and then you must right click on it. After that, you must hit Cut.
- Now, you must stop the Play button.
- Then, you must go to the Toolbox and enter the background that you want.
- You have to size the background as per requirement.
- Now, pasting the character must be done by you. You must paste in your ‘cut’ character from the previous step and position it onto the background as you want.
- In this step, you must save your created file. You must use the Export Selection Mode and save your exported file in your computer.
Steps to Edit Your Roblox GFX with Blender
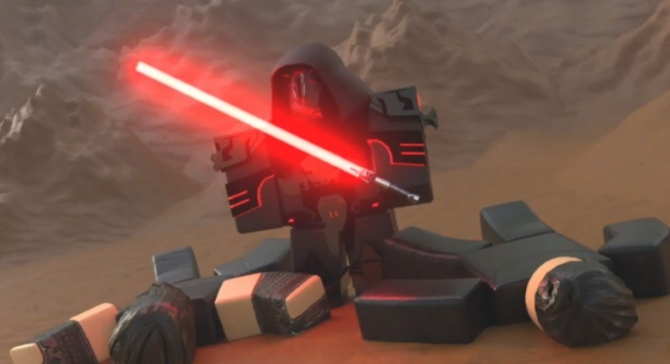
Blender is the most basic 3D program that you are able to use to edit your Roblox GFX. If you want to use it, you must learn certain abilities which you are able to get through time after you use this program again and again.
Changing the backdrop, adding lights, movement to your avatars, animations and colors can be done in Blender. You are able to follow the steps below to edit your Roblox GFX with Blender according to the Stealthy Gaming site.
- The first step that you have to take is to start Blender.
- After you start your Blender, then you must go to file.
- Here, you have to open and choose your Roblox studio file.
- In this step, you must change components. When you first open the program, the components will be all white. You have to change it by going to View and then choosing Material.
- Now, you must include light sources.
- In this step, you must make your frame. Setting the blender camera to aim at the location that you want in the scene must be done.
- Here, the environment needs to be changed.
- You are able to change the environment on the position of your character, such as sitting on a couch or on the grass.
- In this step, you are required to set your export size and rendering time.
- Now, you are able to begin rendering.
Using Photoshop to Make Your Roblox GFX More Awesome
You can skip this step, but using photoshop can help make your Roblox GFX more awesome. In this program, you are able to use color adjustments, color correction and other effects so that you are able to differentiate yourself in Roblox.
You are able to make Roblox GFX by getting a screenshot of your avatar and it is recommended against grey, a white or green backdrop. It can be done by using Photoshop or Photopea.
Let’s say that you use Photopea. If so, you are able to open your picture in it and then remove the background. After that, you are required to search some landscape photos from Google that can be suitable with your avatar. Then, you must put them behind your avatar. After you put the background, then you are able to use editing techniques which are able to be found on Youtube. You can do that to create shades, lighting effects, adjust colors and more.
Steps to Create Roblox GFX Without Blender
You may want to create a Roblox GFX without Blender. If you want to create Roblox GFX without Blender, you can use other tools as explained below according to Stealthy Gaming.
- First, you need to have a Lightshot. If there is no Lightshot on your PC, you have to download it.
- Another tool that you need is Lunapic. Lunapic can be used online and you can use it to edit your screenshot picture.
- Now, the thing that you have to do is to play the game. You are able to start playing the Wigs and Makeup game. There, you have to make sure to pose as cool as possible. You also need to choose your attire. After that, you must go to the green screen and let the titles take over. Make sure that you make your best pose. And then, you must click your screenshot.
- Now, it’s time to edit the pictures using Lunapic. To edit it, you must go to the website of Lunapic and then find the photo that you want to edit. At Lunapic, you need to click on the Select File button to find the photo you took. After that, you need to choose Green Screen. You are required to edit values and parameters. For transparency, it is better for you to choose a value between 40 to 43 and then hit Apply. The format of your image must be PNG. Then, don’t forget to save your photo.
- If you have adjusted the transparency and resolution, now you need to choose a beautiful background that you want to use. It can be found on Google Images, Pinterest and other sites. After you find the backdrop that you want, you have to save the best one to your gallery.

AUTHOR BIO
On my daily job, I am a software engineer, programmer & computer technician. My passion is assembling PC hardware, studying Operating System and all things related to computers technology. I also love to make short films for YouTube as a producer. More at about me…
![Roblox Greenville [Auto Farm] Scripts](https://www.alfintechcomputer.com/wp-content/uploads/2025/08/Roblox-Greenville-Auto-Farm-Scripts-450x240.jpg)


![Roblox Universal Script [Noclip]](https://www.alfintechcomputer.com/wp-content/uploads/2025/03/Roblox-Universal-Script-Noclip-450x240.jpg)


Leave a Reply