
Apple’s latest macOS 10.15 Catalina is very similar to previous versions of the operating system, but very different internally. The biggest change was that Apple removed all the code that previously allowed older 32-bit applications to run on Apple’s 64-bit operating system. Apple warned that there would be such a change a few years ago, and there is no doubt that a full 64-bit OS like Catalina is more efficient than the older macOS. But for many users, Catalina blocks apps that have been relied on for years. Here I will show you how to run 32-bit applications on an undesigned OS.
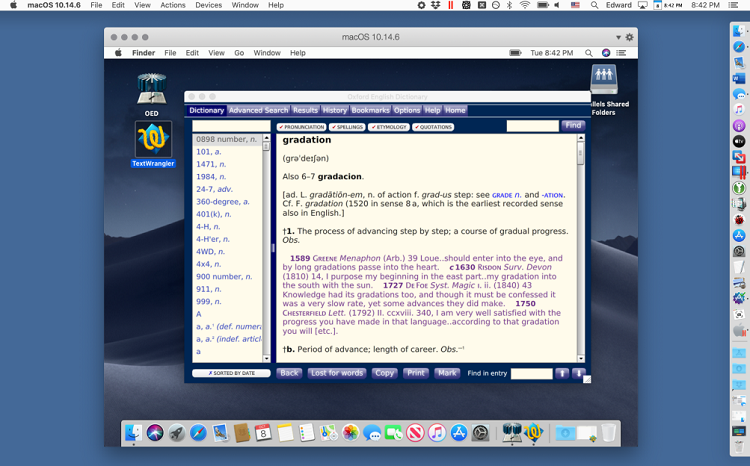
Before upgrading to macOS Catalina, make sure you are using a 32-bit application that you cannot do without. The easiest way to do this is to click the Apple icon in the upper left corner, then click About This Mac, then System Report, and scroll down to Software / Applications. It takes a while for your Mac to gather application information and display a list of all applications on your computer. Find the column heading “64-bit (Intel)” and click the column heading. For all 64-bit applications, this column says “Yes”. All 32-bit applications are marked as no. You might be wondering how many 32-bit applications there are. If you browse this list and find the 32-bit application you want, you can search for a 64-bit update or replacement, or implement the workaround below.

32-bit applications that you can find on your computer are usually old Mac applications that have been abandoned by the developers (or the developers are in no hurry to update), as well as applications based on the Wine software project that can run on Mac and Linux computers … Windows software. (Wine stands for “Wine Is Not an Emulator,” but actually mimics Windows functionality, allowing Mac and Linux computers to run some, but not all, Windows applications).
If you need to run 32-bit apps, Apple unofficially recommends keeping your old Mac running on an older version of Catalina, or partitioning your current Mac so you can start with the old macOS. Catalina, like version. Both methods work, but seem inconvenient and time consuming. However, there is a better alternative.
The easiest way (but keep in mind that it costs money): Buy Parallels Desktop or VMware Fusion if you don’t already have one. These programs are primarily designed to run Windows on your Mac, but you can also use them to create virtual machines running macOS in a window on your Mac desktop. Parallels is the easiest to use, but VMware Fusion is second to none.
The steps depend on whether you are using macOS Mojave or have already upgraded to Catalina. If you are still using Mojave, let’s start with the steps you need to take.
Step 1: Launching the parallels desktop

Select New… from the File menu to open the Installation Assistant panel. In your Free Systems, please scroll to the right on your display screen and then click Install macOS 10.14.6 with using the Recovery Partition. (Your system may show a different version number.) If you have upgraded to Mojave from an older OS version, you may be presented with an option to install the older version. Choose the version that suits you best.
Step 2: Creating a new virtual machine

The next helper page is macOS 10.14.6. Click the Install button. Parallels will launch the macOS installer and create a new virtual machine. When done, you will be asked to specify the language in which you want to interact with the virtual Mac. Choose your preferred language and continue.
Step 3: Prepare to install Mojave

The macOS recovery environment opens in the virtual machine. (This is the screen that appears on all Macs when holding down Cmd-R at startup.) From the macOS Utilities menu, click Reinstall macOS. The next screen will ask you to install macOS Mojave. Click Continue. Click Accept on the License Agreement screen, then click Accept on the pop-up menu.
Step 4: Install Mojave on the virtual disk
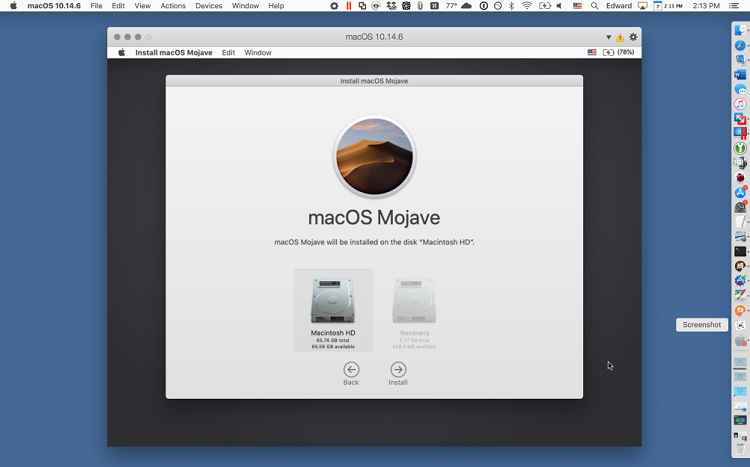
Don’t be intimidated by the next screen, which prompts you to install Mojave on a hard drive named Macintosh HD. This is not your Mac’s hard drive, this is a virtual hard drive for a virtual machine created by Parallels. Click Macintosh HD, then click Continue. Now wait for Mojave to install to the virtual drive. This may take 30 minutes or more.
Step 5: Mojave set up
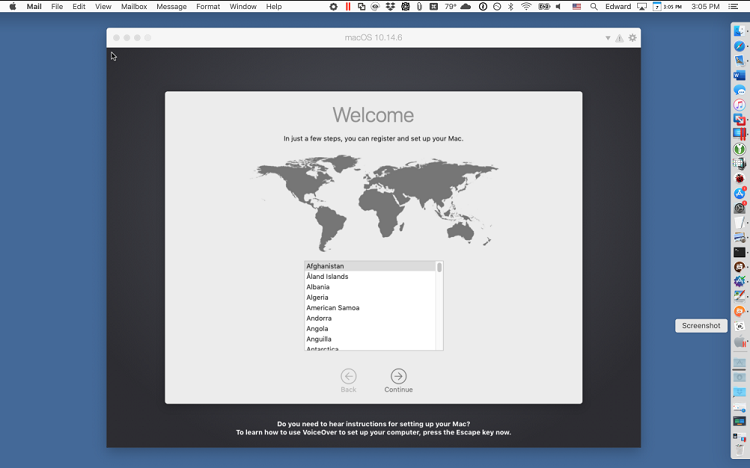
Virtual Mojave displays the same setup screens on your macOS normally displays when installing the OS go on.
Step 6: Completing the Mojave installation
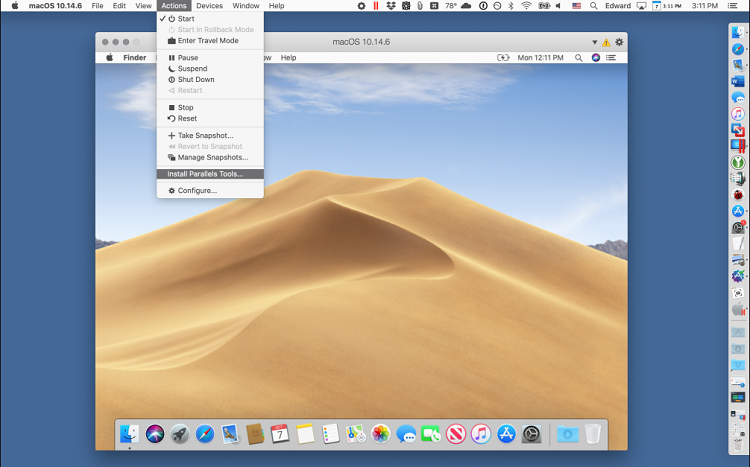
When the installation has been completed, you will see the default Mojave desktop. From the top menu of your physical Mac (not the top menu of the virtual machine), choose Actions, then choose Install Parallels Tools.
Step 7: Installing the parallels tools
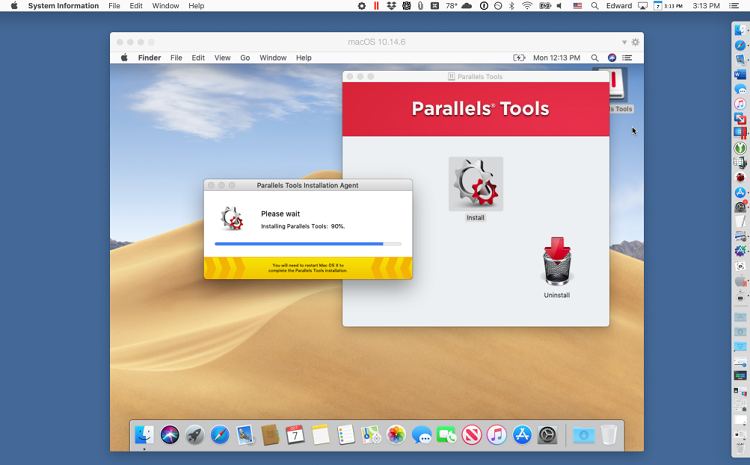
Follow the instructions to install Parallels Tools on your Mojave virtual machine, then restart the virtual machine.
Step 8: Transfering 32-Bit Apps into Mojave
![]()
Drag and drop 32-bit apps from your real Mac to your Mojave virtual system. Double click to run. If you are running an older version of Mojave, you will see a friendly pop-up warning that the 32-bit version is not optimized for macOS and needs to be updated. Ignore the warning.
Step 9: Upgrading the current OS into macOS Catalina
Now you can switch to your current OS into macOS Catalina. When the update is complete, launch the Parallels Desktop and Mojave virtual machines. (In this screenshot, Mojave is running at night, so it shows a nightly desktop image, but this is the same virtual machine as the previous screen. Here I’m running a 32-bit application that doesn’t work on Catalina itself.
Step 10: Let’s get start it with a new face of Catalina macOS
If you’re running a 32-bit application, go to the Parallels top menu and select View/Consistent Input. The 32-bit application appears in its own window on the Mac desktop, and a second top bar menu (virtual Mac menu) appears below the top bar menu in the main macOS installation. As you can see this on your current window, maybe Catalina macOS is running, but the 32-bit apps will running in same similar window true of the other apps too. The virtual machine dock is displayed at the bottom of the screen, but can be easily disabled in the virtual machine’s system settings.
You can now have precise control over applications in Parallels and have one or more 32-bit applications run automatically when your virtual machine starts using the System Preferences application in Virtual Mojave. (Go to the Users & Groups preferences panel and then to the Login Items tab).

AUTHOR BIO
On my daily job, I am a software engineer, programmer & computer technician. My passion is assembling PC hardware, studying Operating System and all things related to computers technology. I also love to make short films for YouTube as a producer. More at about me…


Leave a Reply